Welcome back for Part 2 of our Survey123 Connect for ArcGIS video series. In this demonstration, we continue to build upon our survey form that was first established in Part 1, by adding the following elements: Media Files, Choice Lists, and Equations. Follow along as we guide users on how to perform these actions, step-by-step.
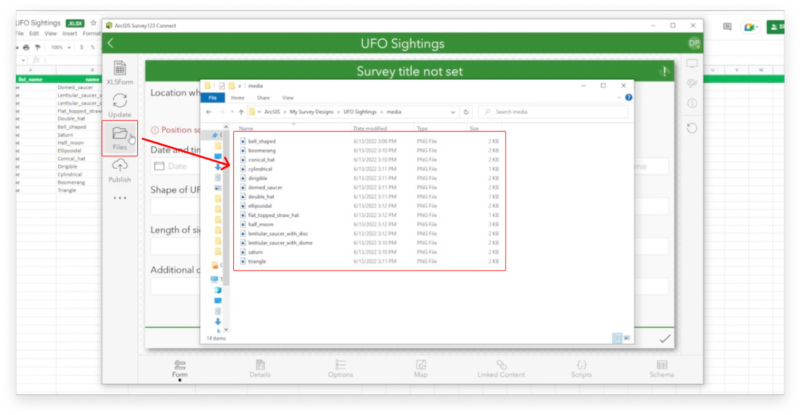
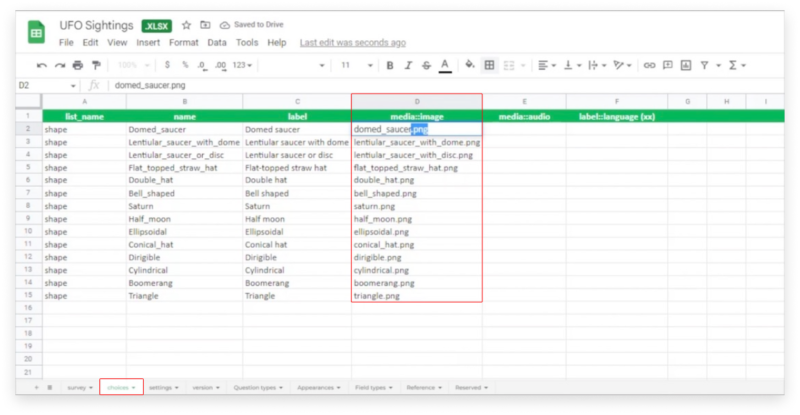
One of the first updates added to our survey included the addition of media files to the XLSForm. To accomplish this, users must first start by bringing up the Survey123 Connect interface, and proceed to click the Files button presented on the left-hand sidebar. Once open, within the media folder, users are able to upload or drop their media files there. Jumping back to the form, users are able to place the actual file names in the media::image column for each respective selection type. It should be noted that the file extension type (.png, .jpeg, etc.) must be added to the name, so the survey knows what to do with that specific file type.
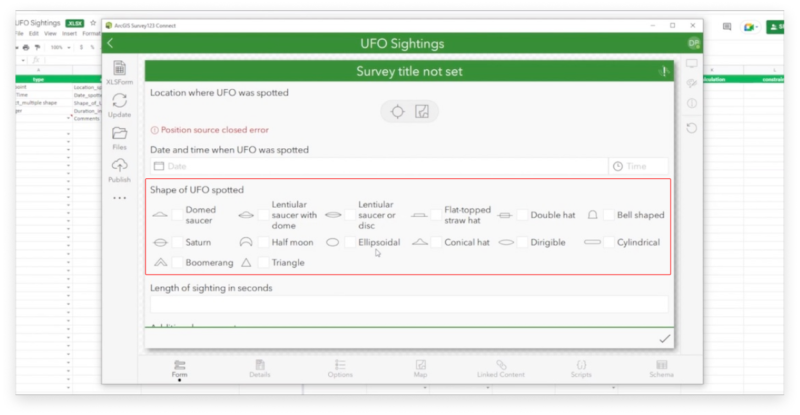
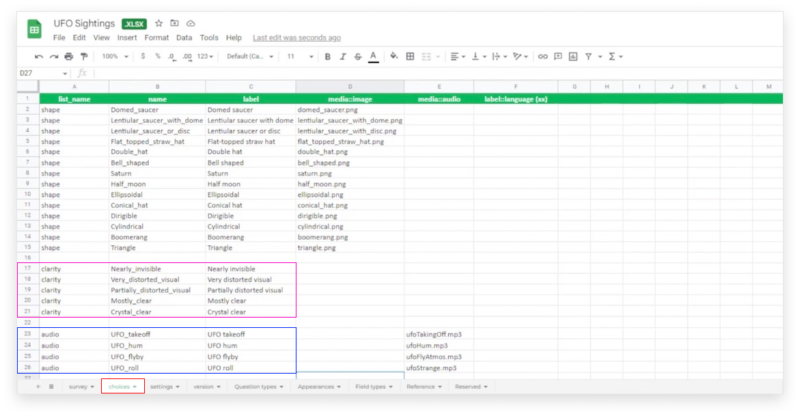
The next section of the survey that we built out involved creating a choice list. Doing this involves adding one of two actions, select_one or select_multiple. Select_one returns the label associated with the name of the choice in the given question. Be aware that the question must be defined inside quotes. While select_multiple returns the label associated with the name of the choice in the given question. The selected-at() function must be used to extract the label for individual answers. Be aware that the question must be defined inside quotes.
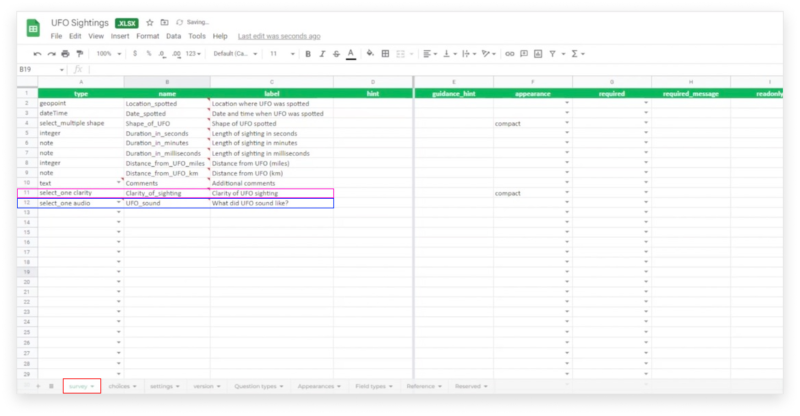
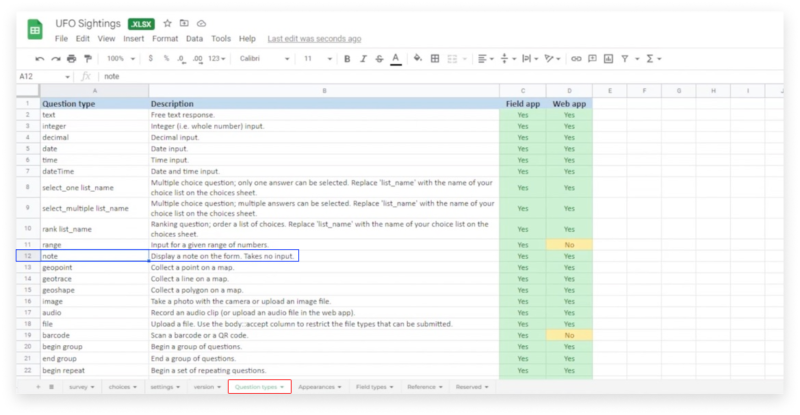
The final section that we built out during this demonstration involves creating an equation for the length of UFO sightings in minutes and milliseconds, along with the distance of UFO sightings in Miles and Kilometers. Start by adding a name and label to the survey form, with the question type set to “Note”. A note can be described as an equation taking place behind the scenes, with no actual input, but will still enable the output to be visible in the survey interface. within the row that you are equating, scroll over to the right to find the calculation column.
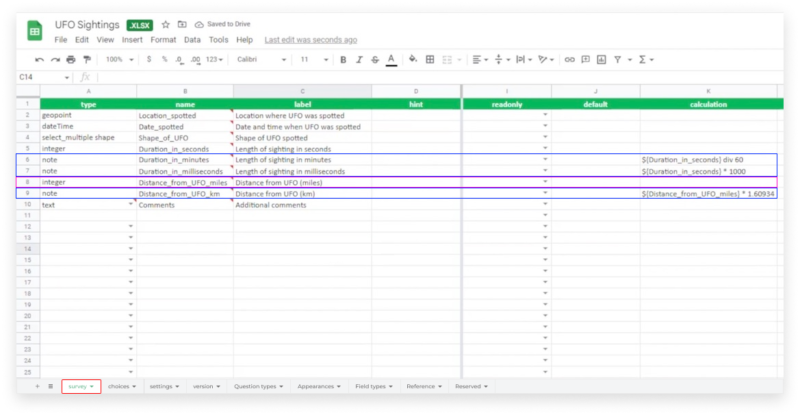
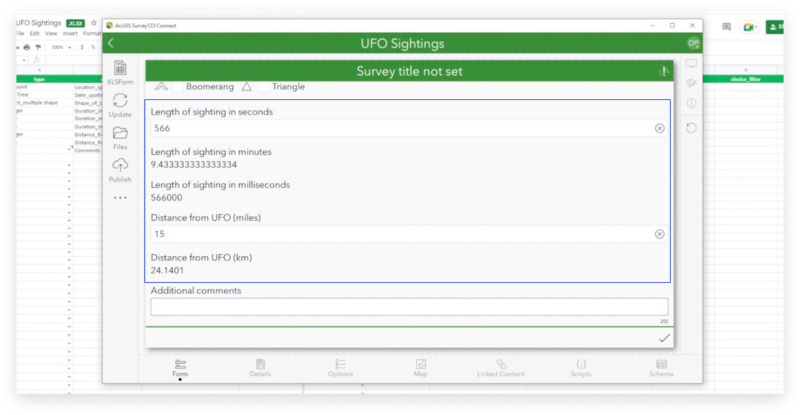
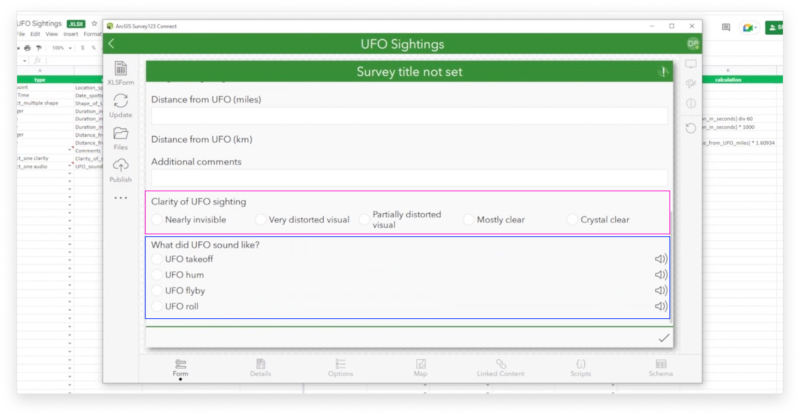
Following the standard equation building methods, users can use the formulas list provided here, to create the appropriate calculation needed to determine the response they’re looking for. Start by adding ${field_name} followed by the specific calculation type that you want to perform. Re-download and open the Survey123 Interface to test and preview different inputs/responses. Rinse and repeat for all equations.
We hope you found this follow-up demonstration both helpful and informative. If you have any further questions about Survey123 Connect feel free to drop a comment on any of our social media accounts or start a conversation today by reaching out to our organization for all of your other GIS-related questions.