The new Express Story Maps offer a quick and easy method for creating simple story maps. Use the simple menu bar to add your points, lines and polygons. Then add your images, location details, and label anything on the map.
Let’s take a quick tour of the options available within the new Express Story Map template. Access story maps the same way you always have, and click create new story.

Give your story map a name and quick description. Then scroll down to start adding all your great content.
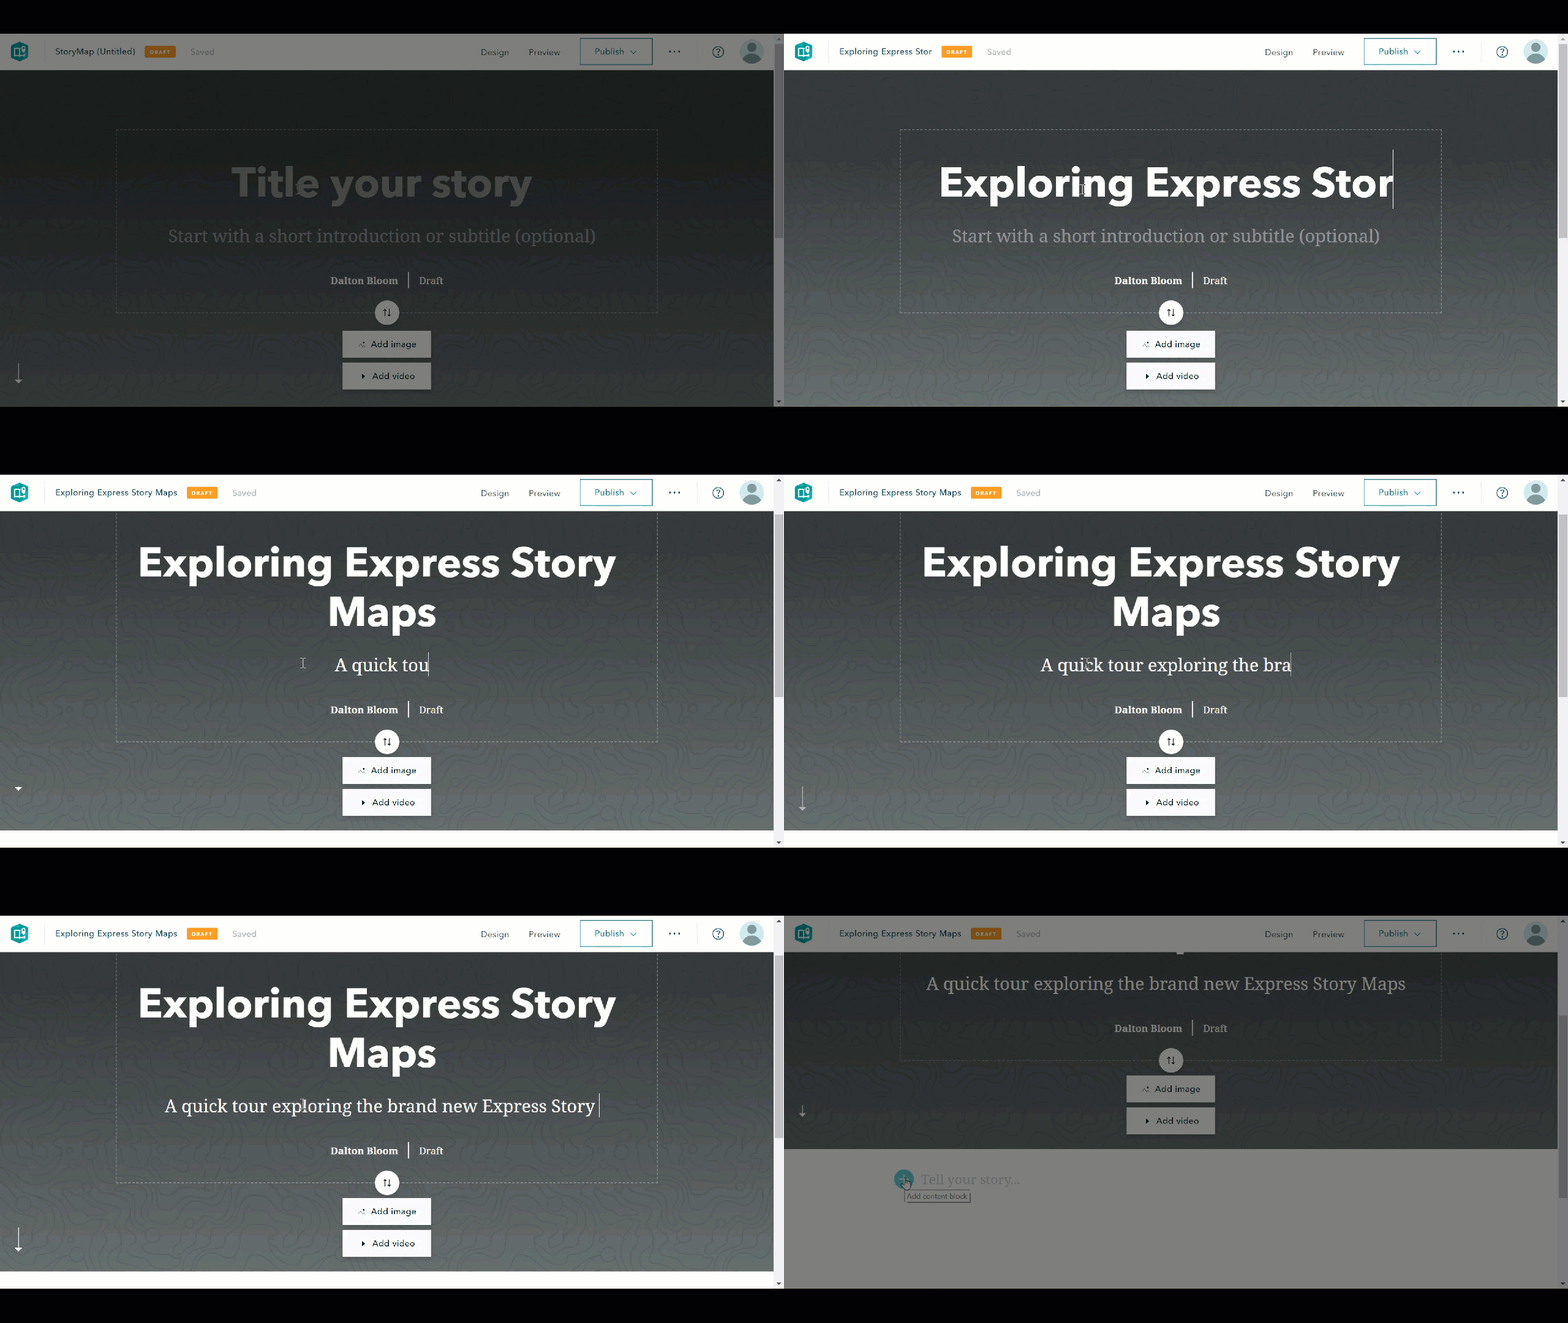
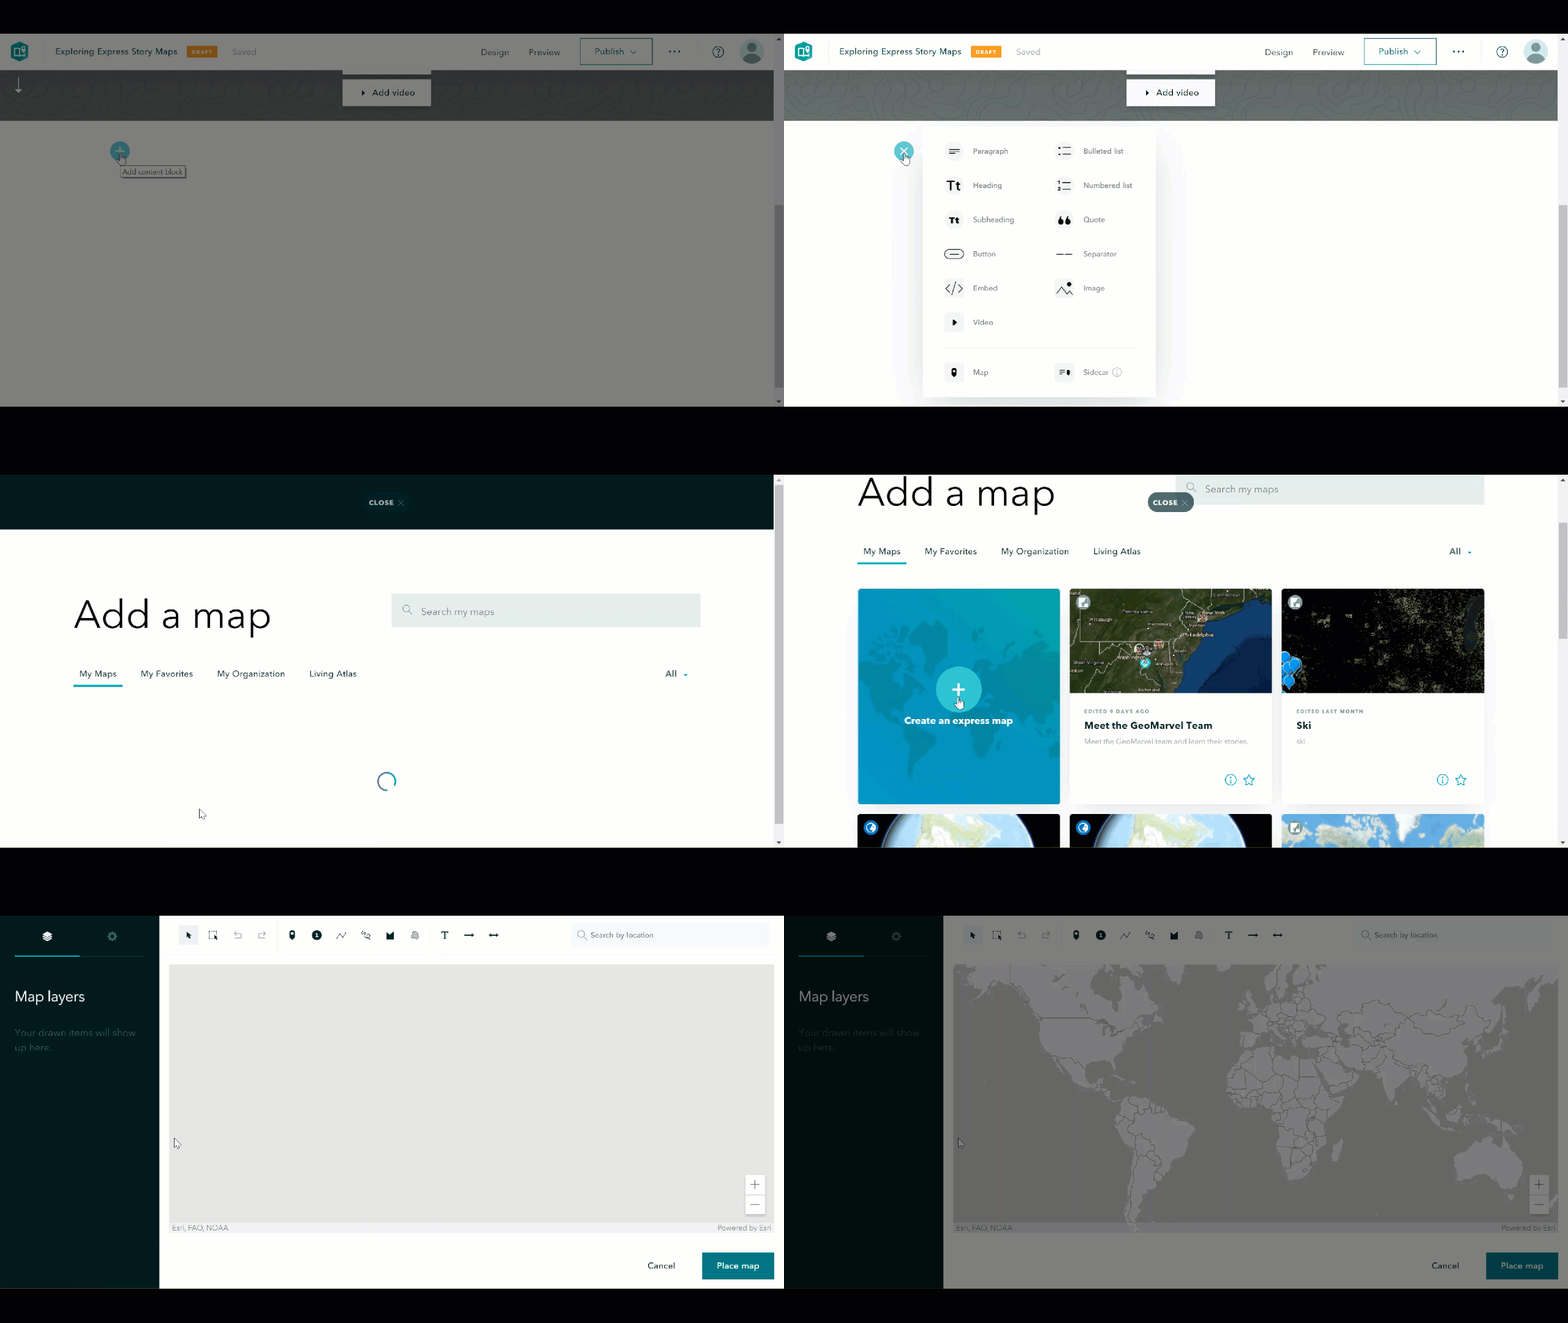
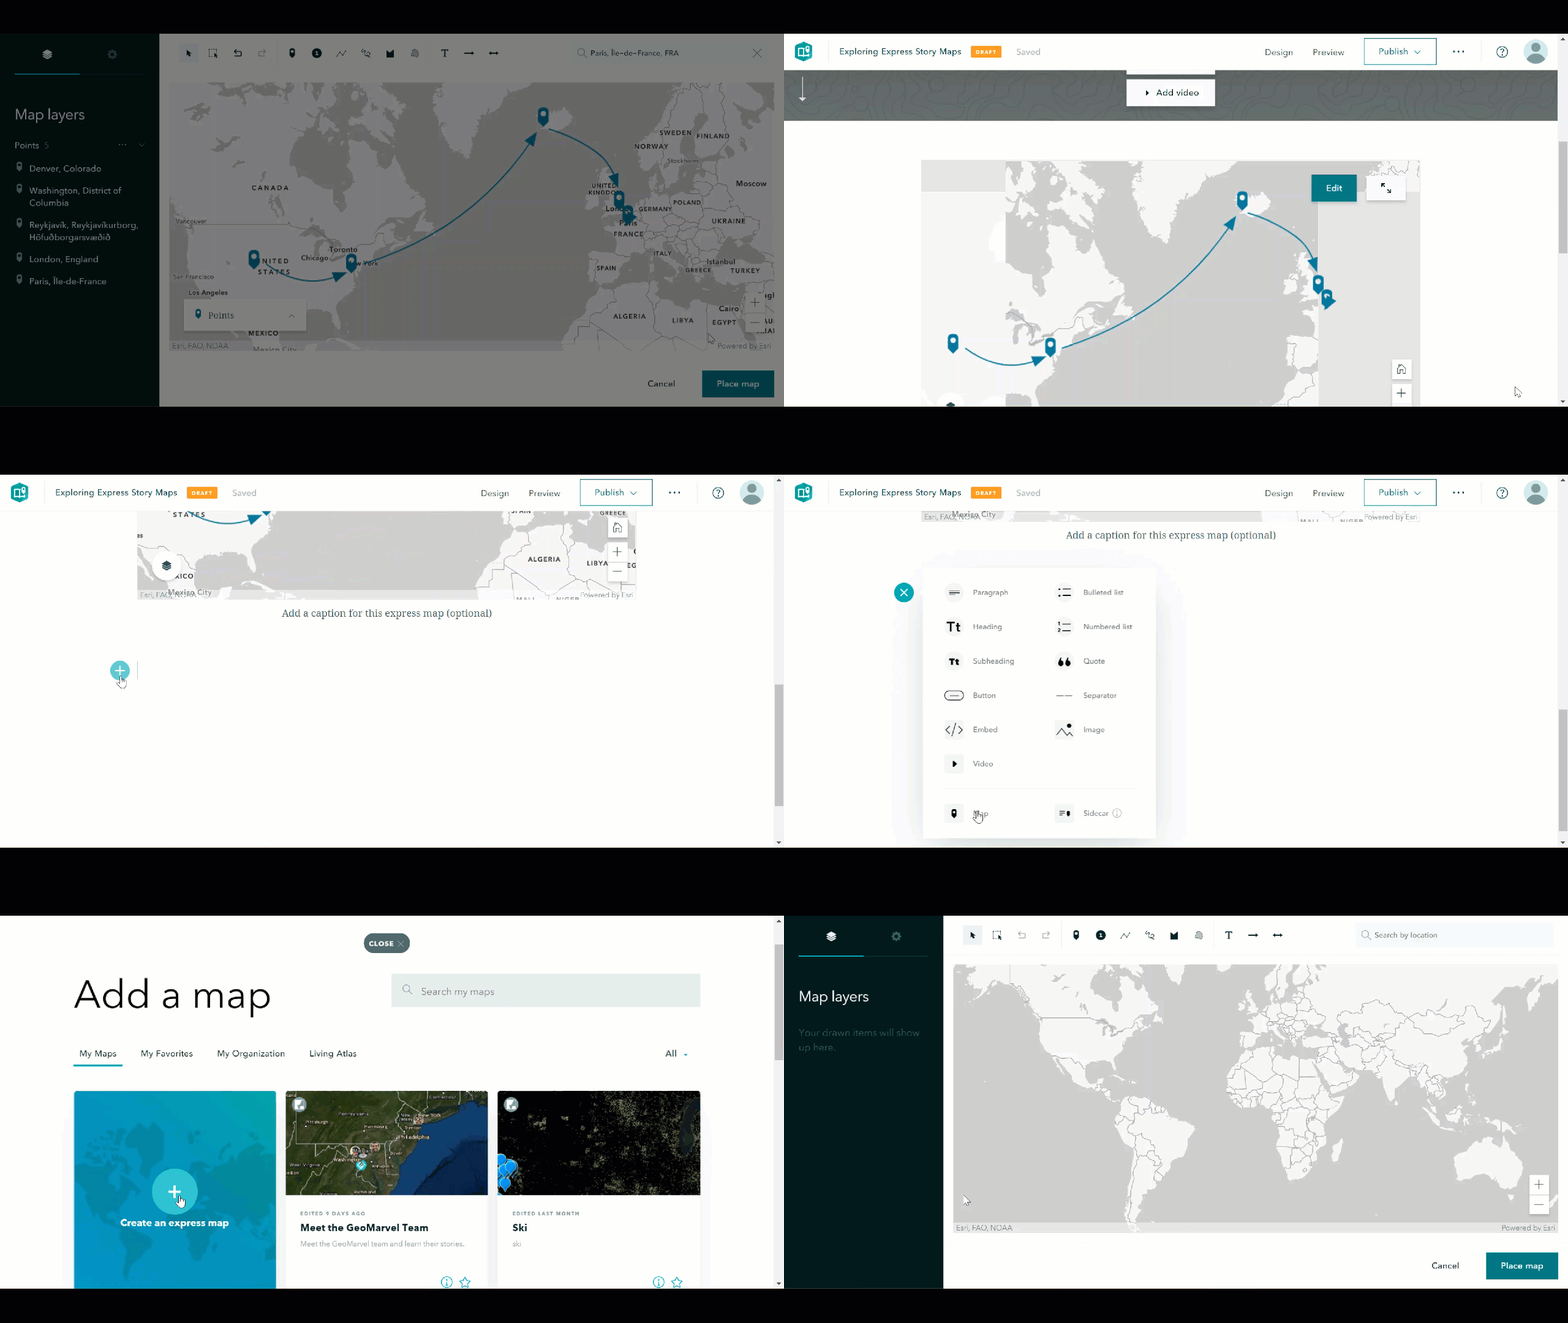
Click the “+” sign to add new content, choose map, then select “Create an express map”.
More detail is always better. Let’s add some points to our new express map. Let’s highlight points of interest along our fictional journey across the United States, and over the pond. Simply click the point tool in the top menu bar, select a location for the point and click “Add to map”. Each added point then offers the ability to add an image and an optional description.
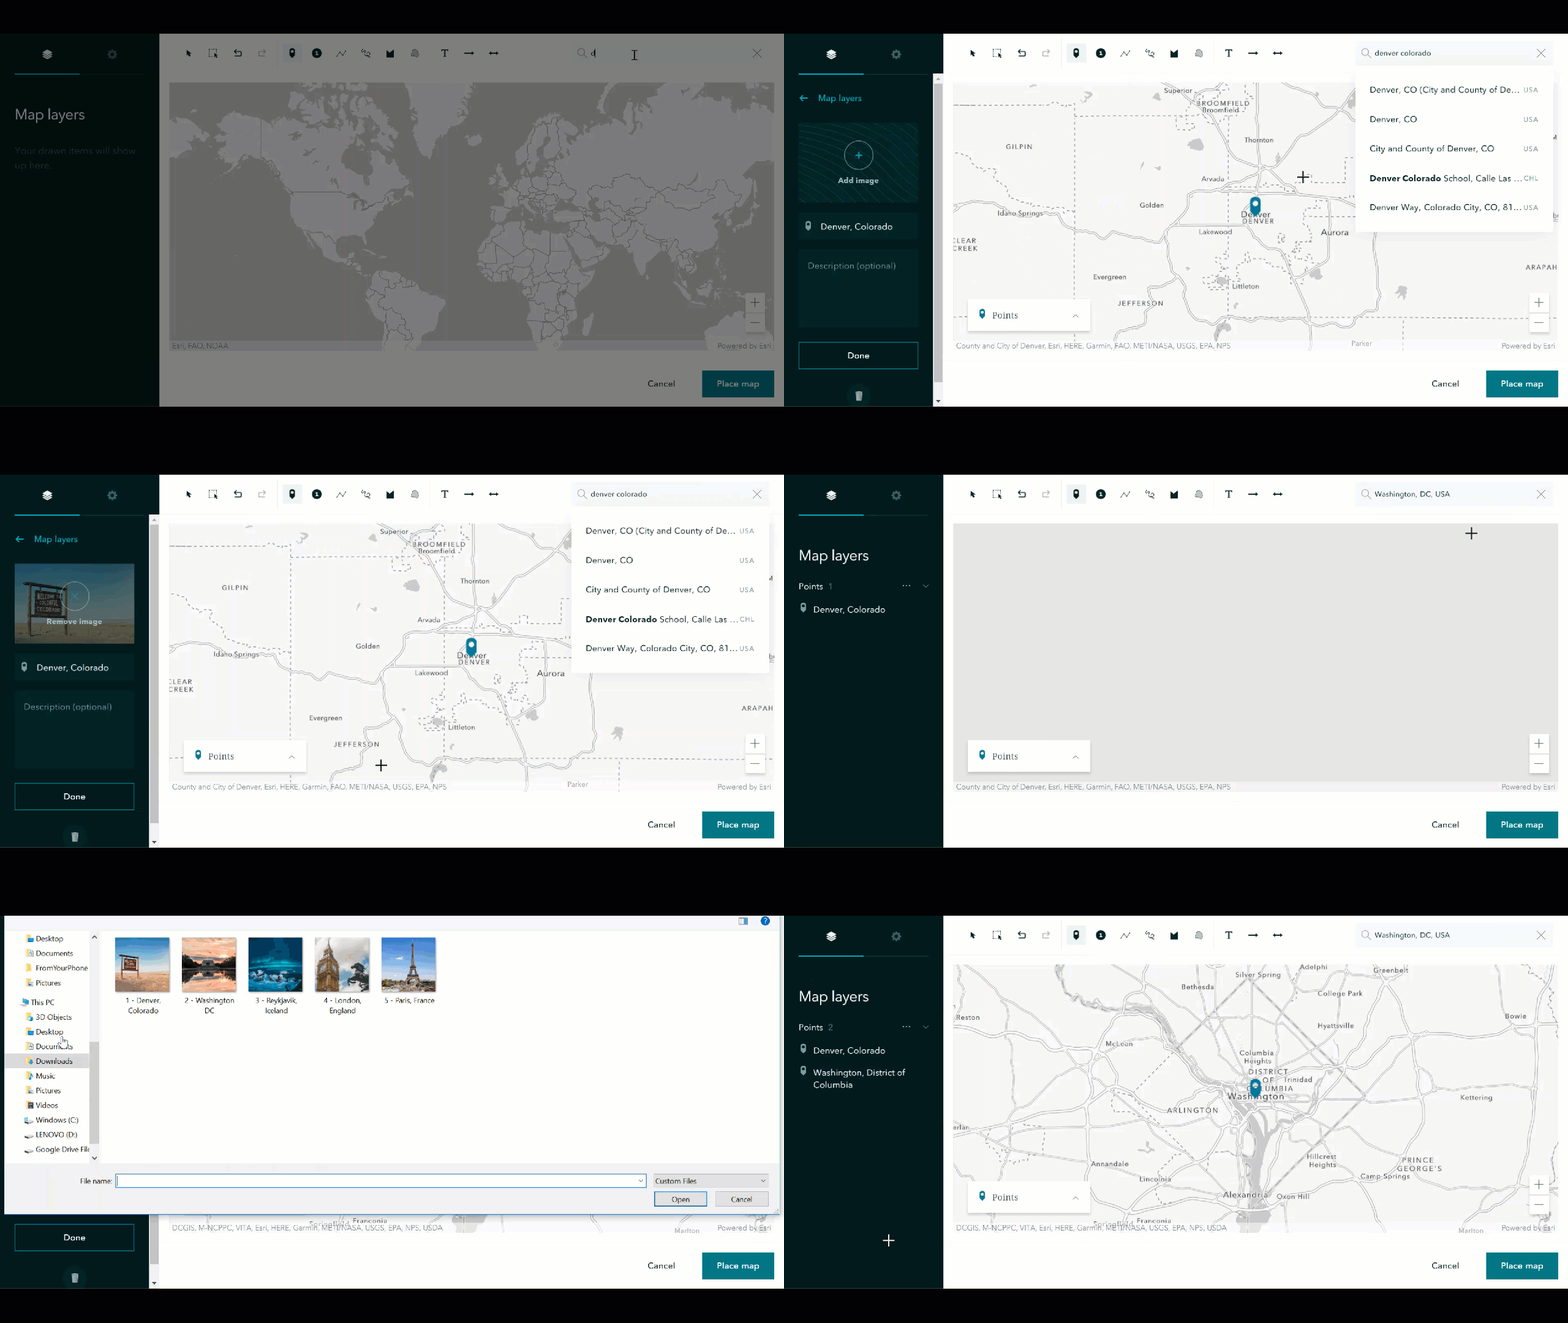
We did say across the pond, so let’s add a few more points as we travel across the Atlantic into Europe. We’ll continue adding points and associated images before finalizing our map.
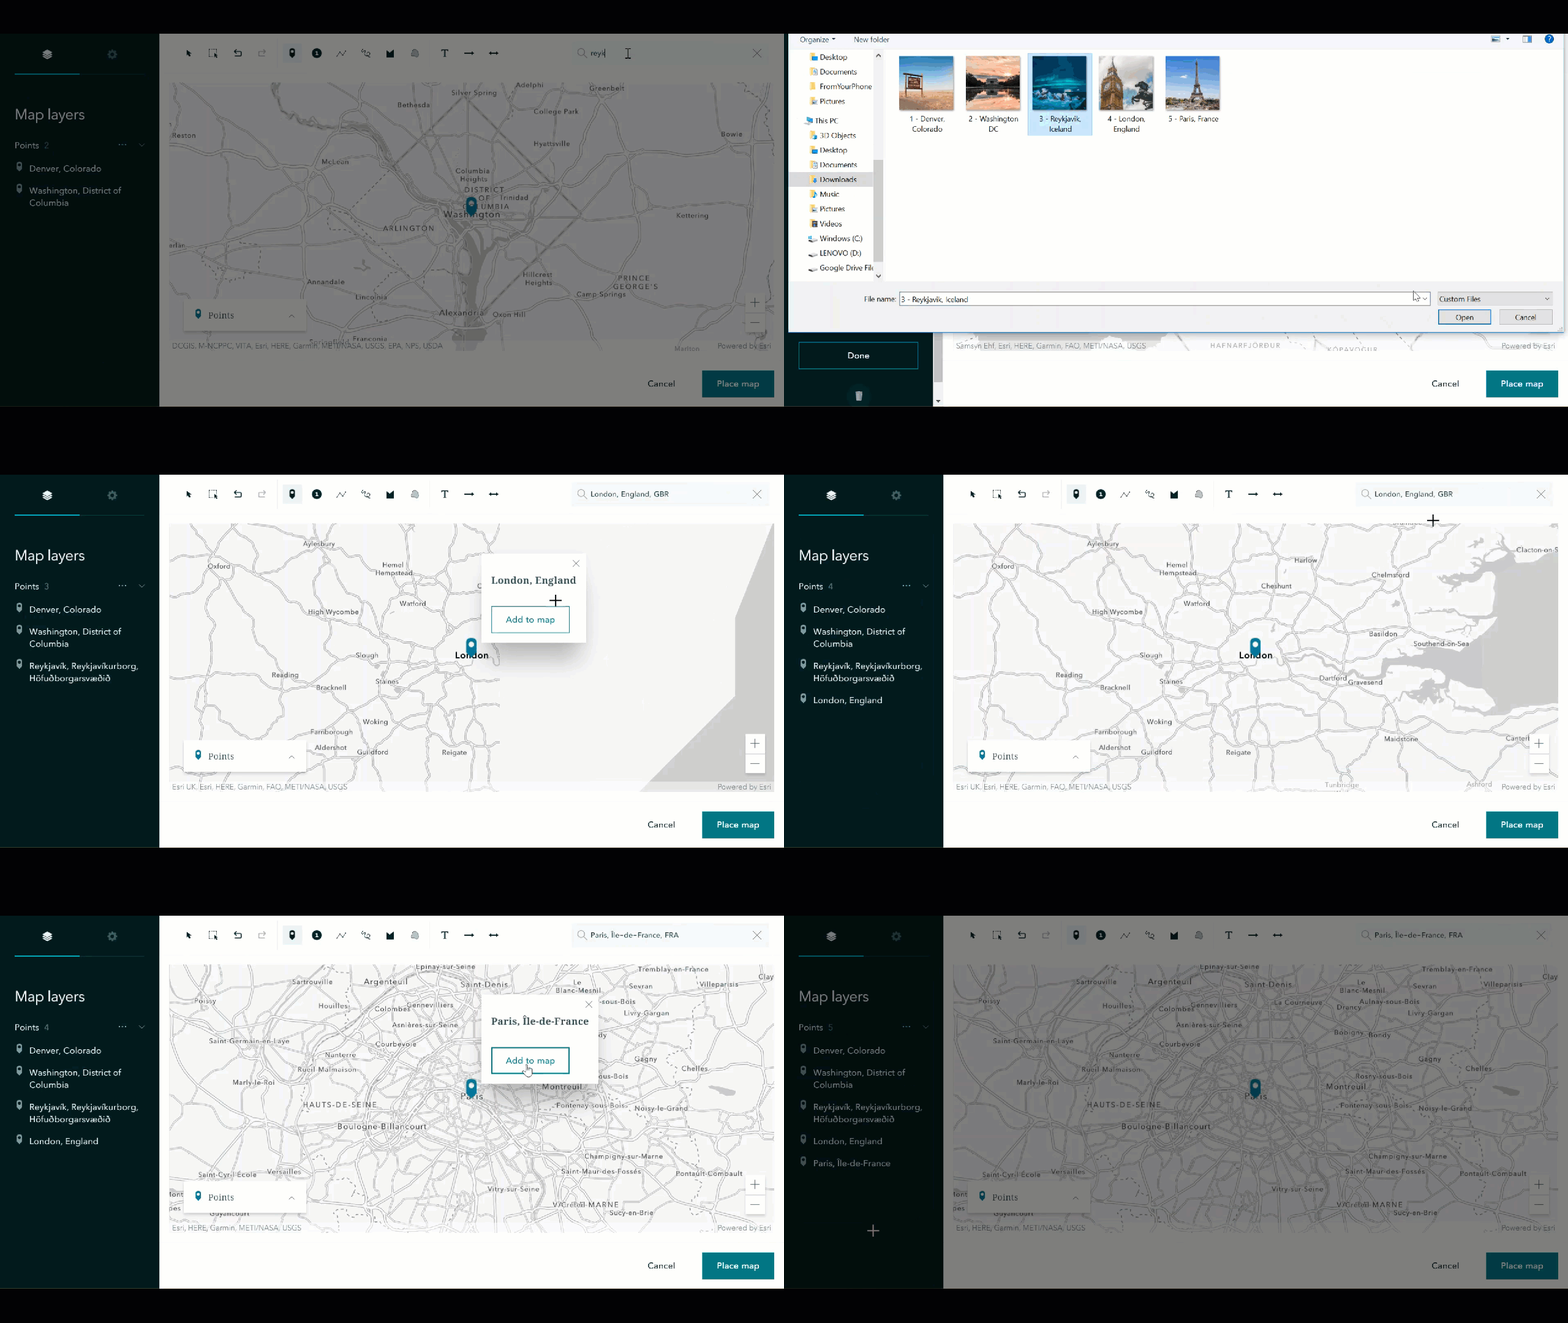
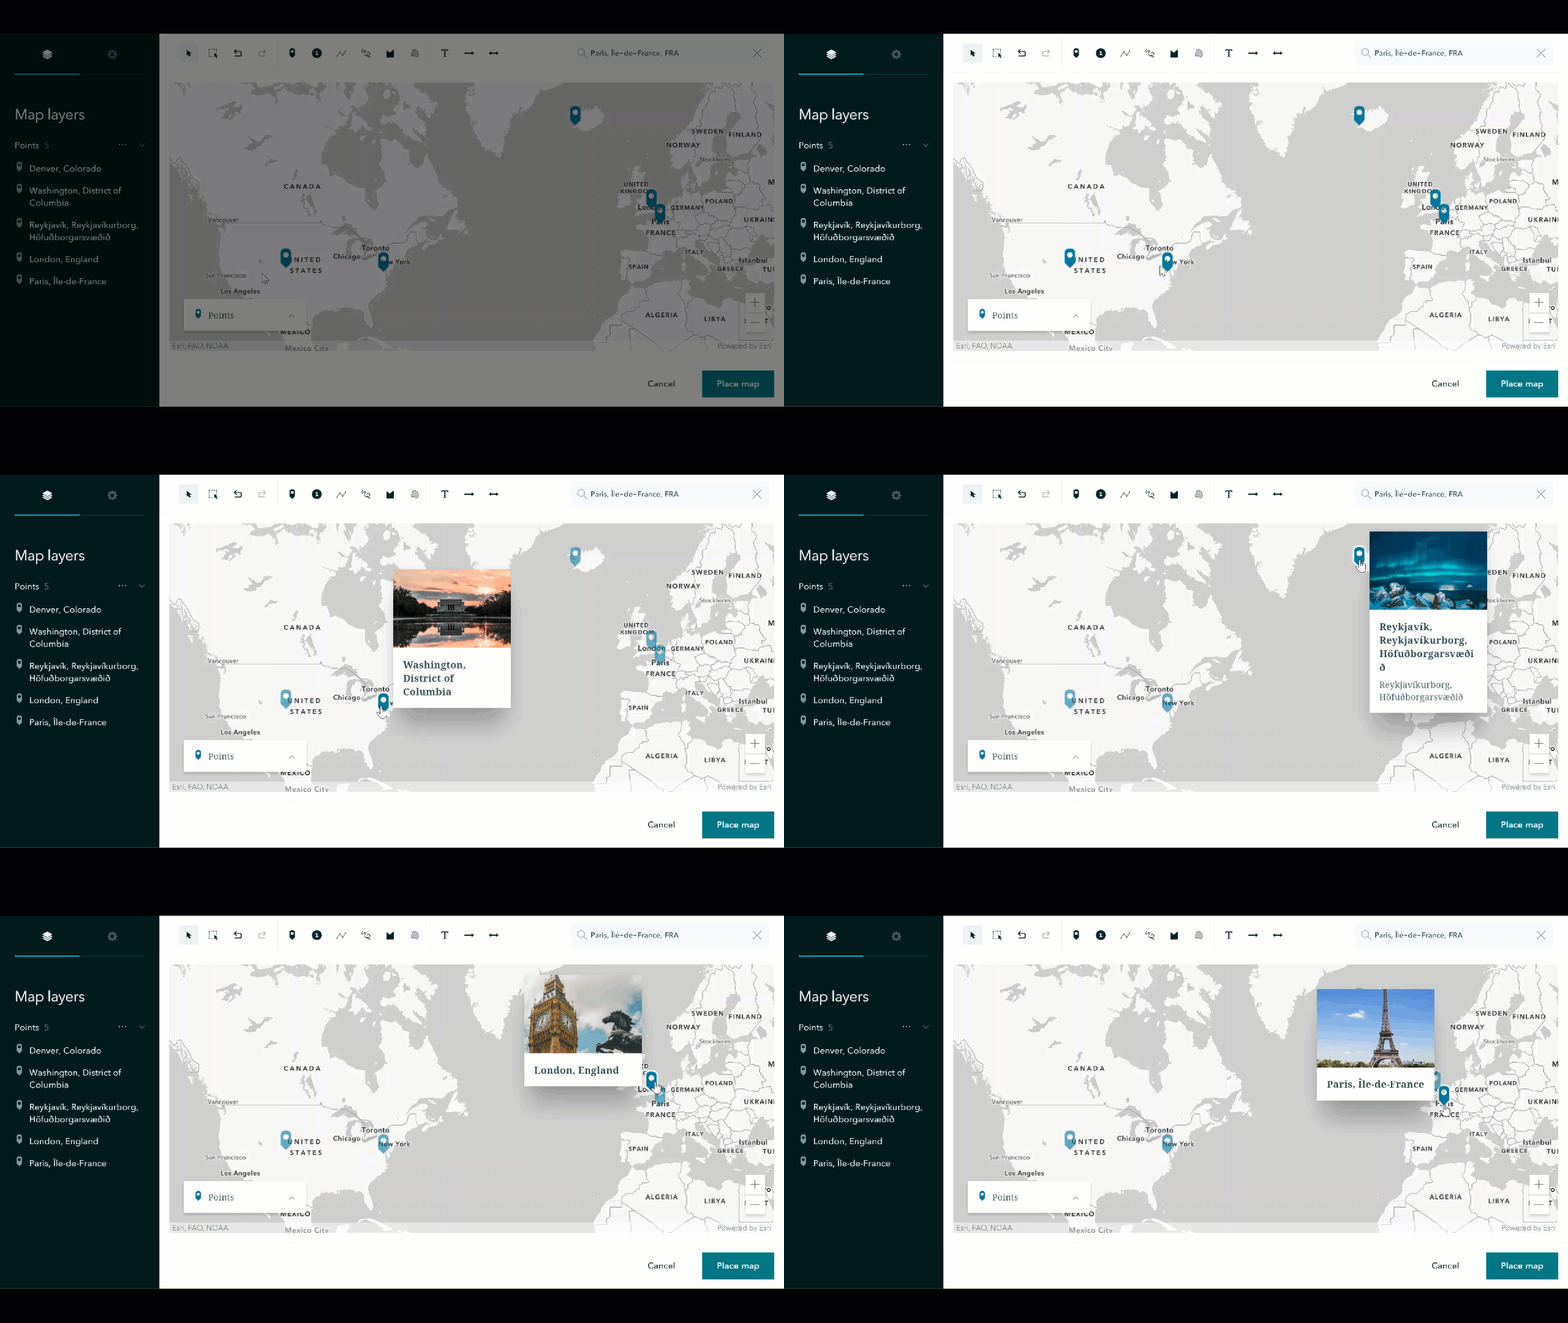
With all our points placed, let’s do a quick review. Hovering over each point with the cursor will reveal key information including the location and the associated image we’ve chosen for the point.
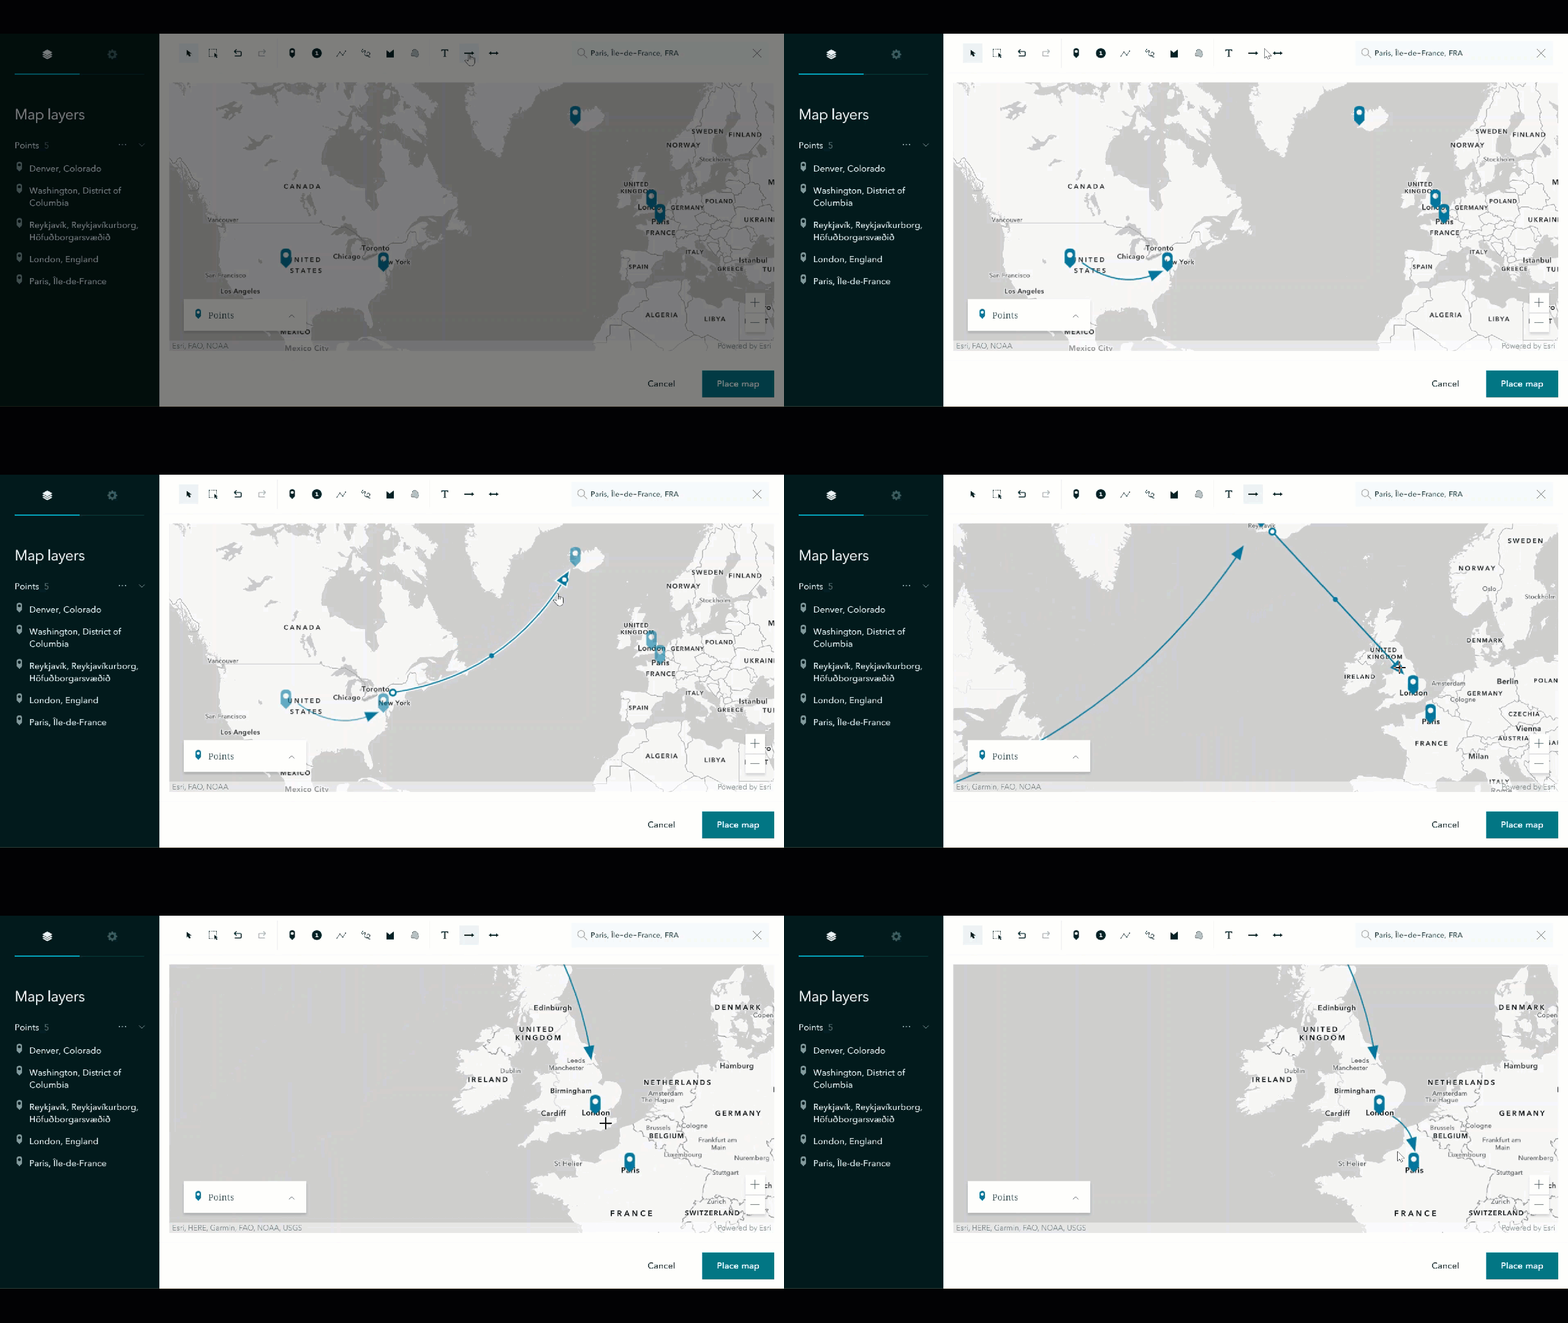
The new express story map template brings a few new features to the table. First off, we can add arrows to signify an order of operations, such as our flight paths from one location to the next. The arrow tool offers an intuitive method for drawing and manipulating each arrow to make the best possible graphic to aid your map visuals.
Here we see a zoomed out visual of our city points and flight path arrows. Let’s finalize the map by clicking the “Place map” button in the lower right hand corner of the window. This will place the newly created map directly into your story map. After adding our map to the story map, let’s scroll down and click the “+” icon to create another Express story map.
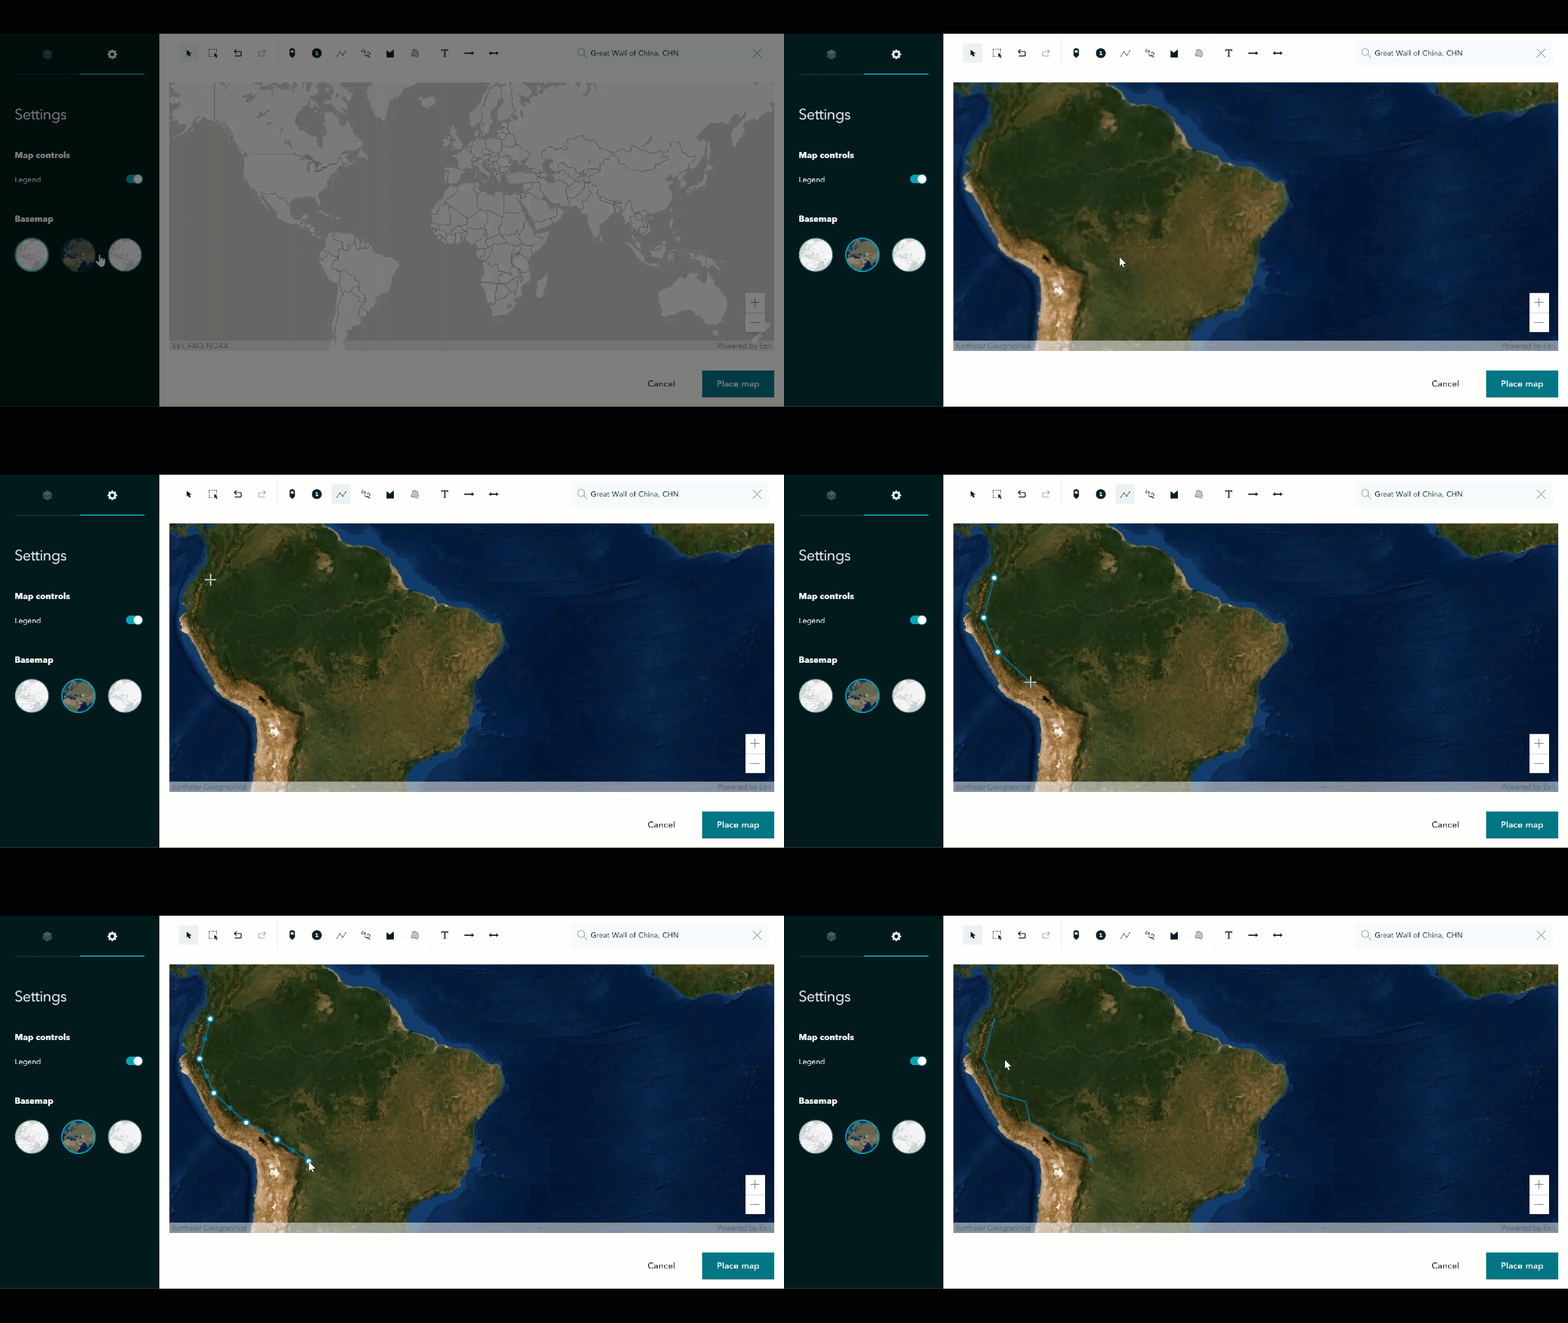
The line tool offers a simple method for adding lines to your map. After clicking the line tool, draw out the line by clicking around the map. Hit “Enter” to complete a line, and manipulate the line by dragging the various points that appear along the line to rearrange it to suit your mapping needs.
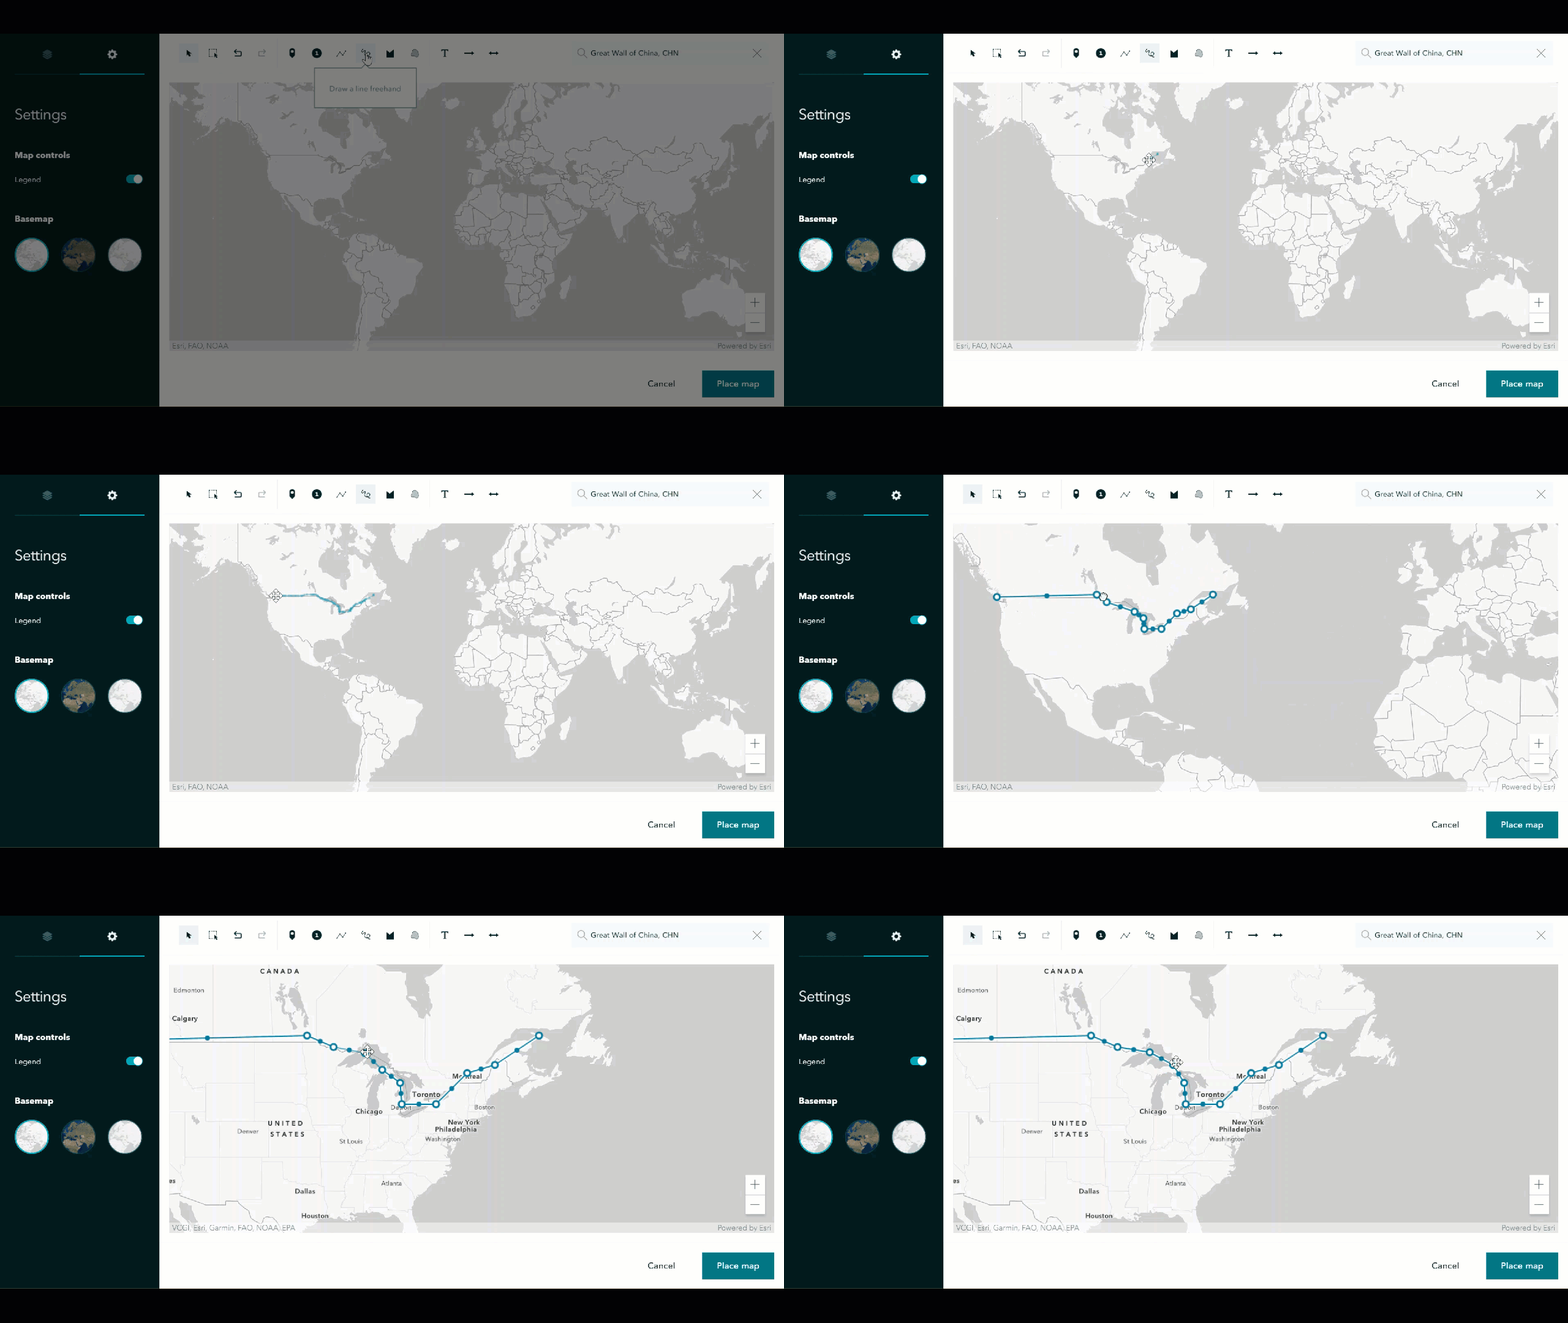
The freehand line tool presents another method for line creation. With the tool selected, simply click on the map and start moving your cursor. And just like the regular line tool, freehand lines are easily altered post creation. Just click to interact with any point along the line.
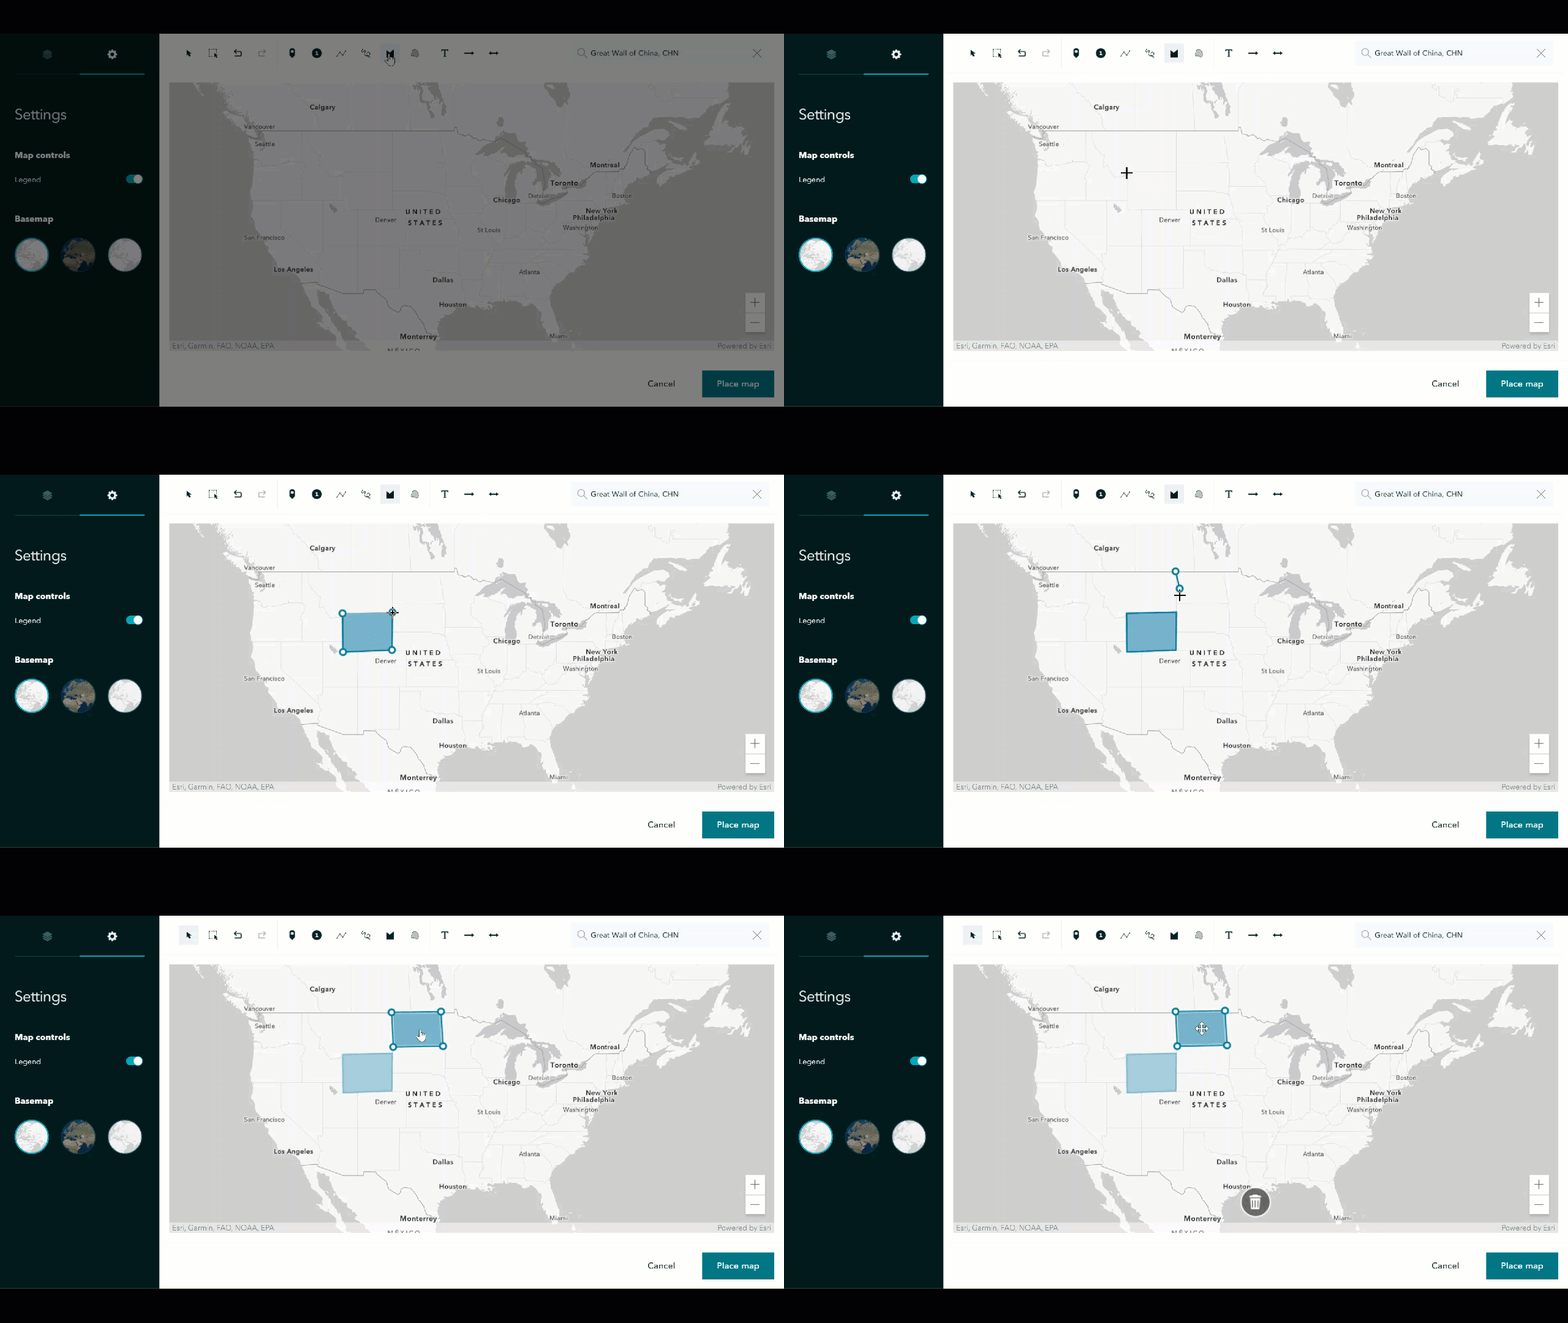
The polygon tool lets you quickly create polygons with a few easy clicks. Move one or all of your polygons to ensure the best fit for your map.
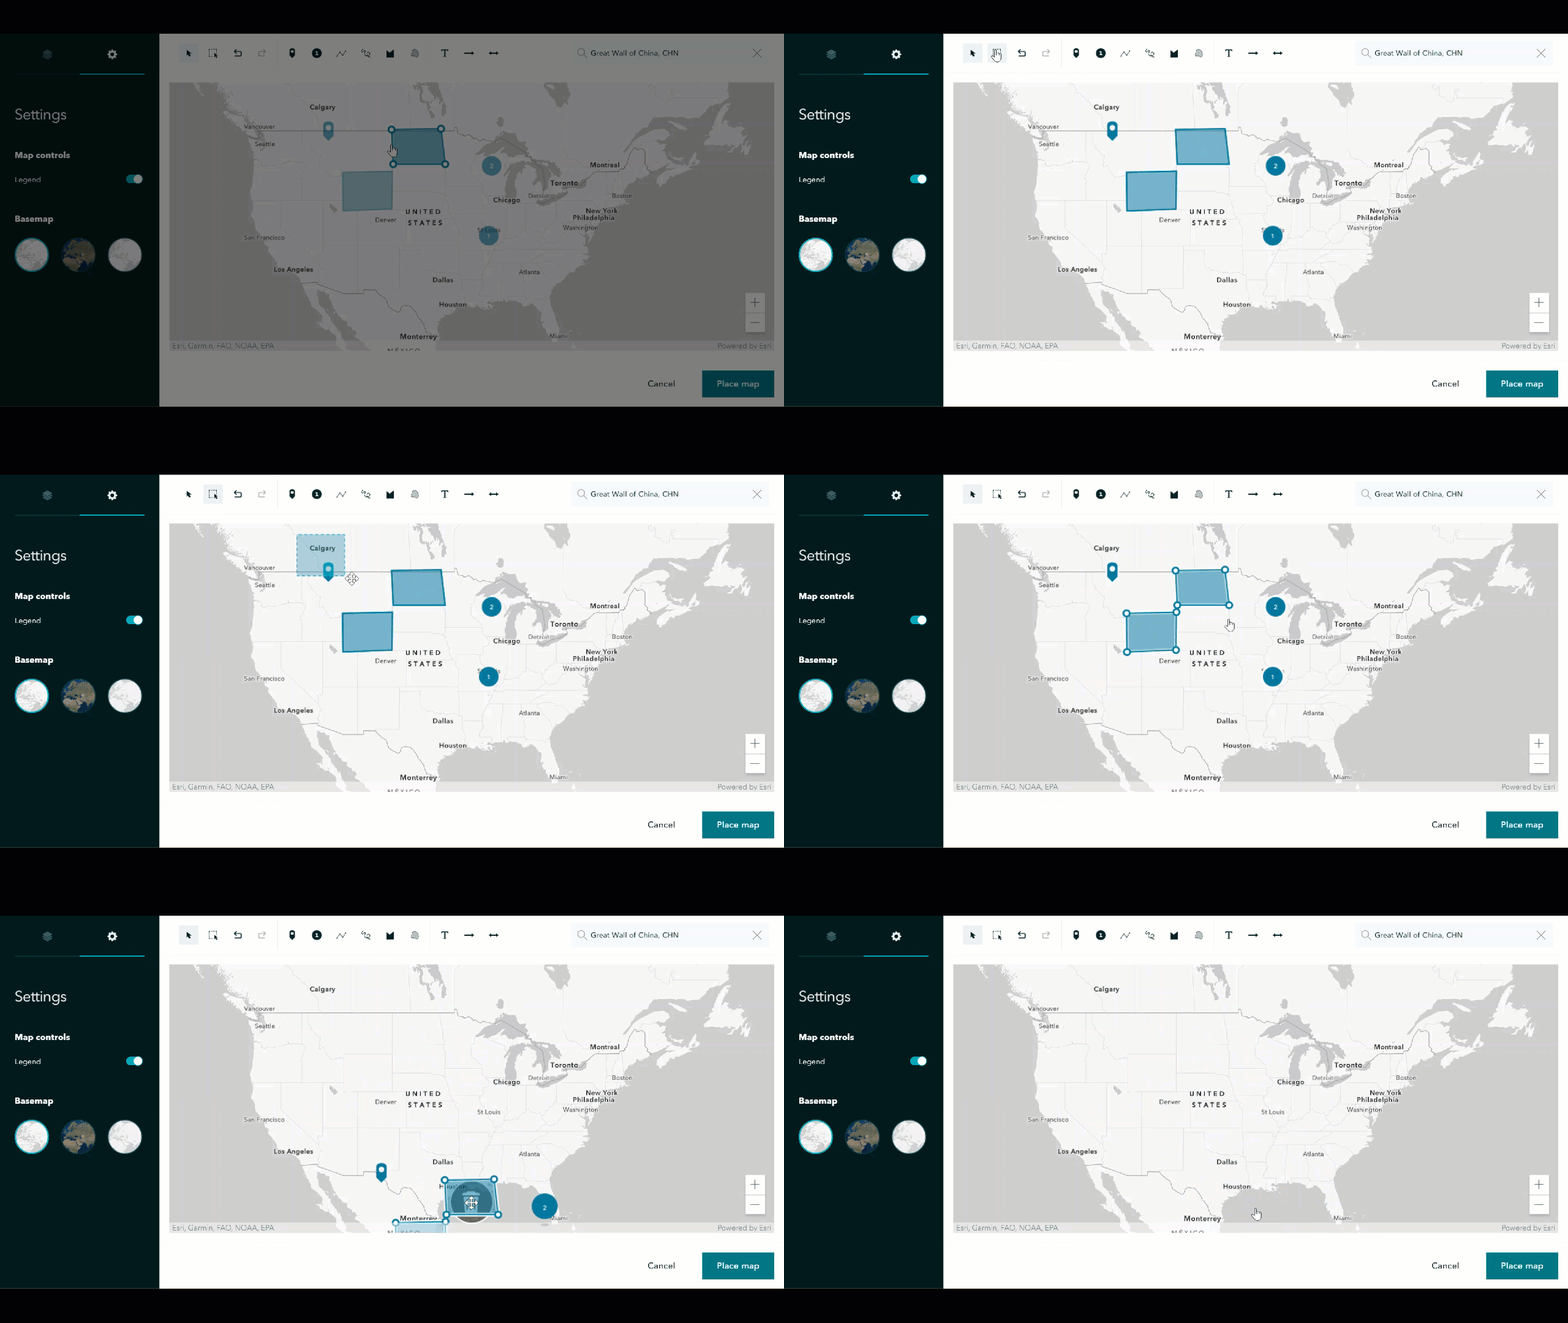
Did you create some features that you’re ready to delete? Get rid of them all at once with the group select tool. Click and drag a selection box around the object(s), then drag them down to the trash can to delete them from the map.
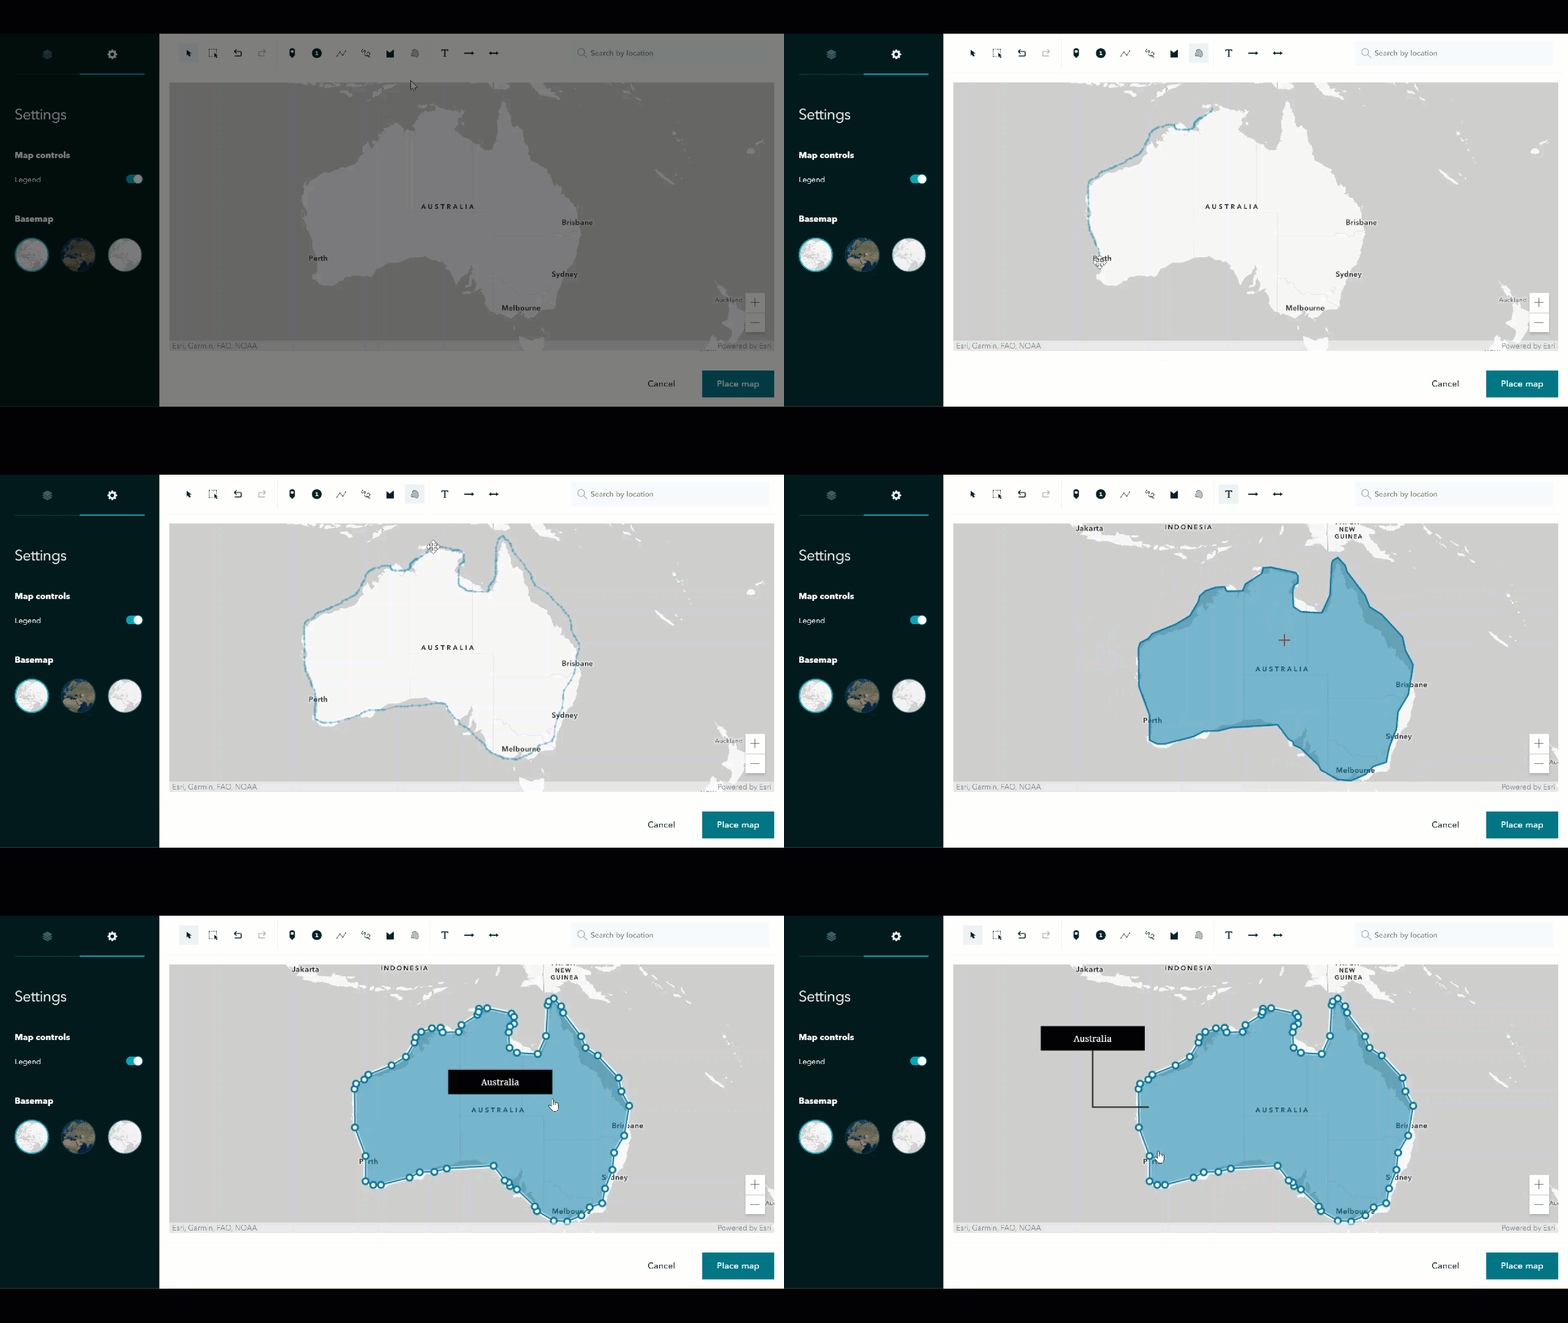
Draw an area with the freehand polygon tool. Here we’ve drawn a quick polygon surrounding Australia. And don’t forget to add labels! The text tool lets you add a label, move it to the best location, and add a lead line for easy labeling of objects and locations on the map.
Express Story Maps offer new methods for telling your story. Create your very first Express Story Map to let your data tell the story. With easy point, line and polygon creation, and plenty of other great features, creating a story map has never been easier.
Get Support
Have you created an Express Story Map yet? Ready to take the creation process even further? Reach out to our professional GIS developers to see what a properly detailed story map can do for your organization.


