The suite of ArcGIS field mobility apps offer the ability to complete your geospatial tasks from anywhere. Collector for ArcGIS enables the collection of geospatial data from the field, office, city, country — you name it. Collector is a mobile data collection application that’s great for cleaning up California beaches, as you’ll see in this walkthrough.
Survey123 is another great field mobility app, offering easy form creation and data collection from your mobile device. Ask the important questions and gather answers from anywhere.
Collector and Survey123 each offer a unique skill set, so by combining the two, we get the best of both worlds. Follow these steps to learn how to integrate Collector into a Survey123 form.
Collector Integration with Survey123
Let’s begin by signing into your ArcGIS Online account. Visit ArcGIS Online to log in or sign up for an account.
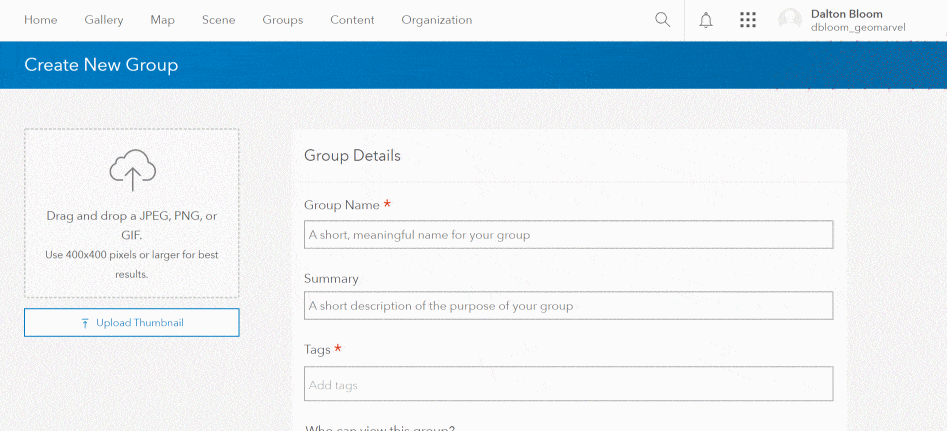
Once logged in, navigate to the “Groups” tab, then click “Create Group” to create a new group for this project. The new group will allow you to invite desired individuals (or the public) to collaborate with you on the project. These settings will be determined in a later step.
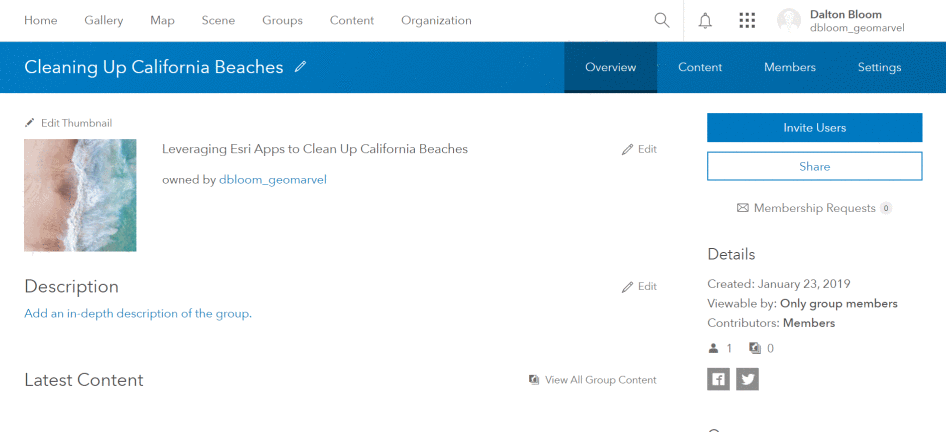
Next, we’ll determine a few group details including the thumbnail, name, summary, and tags.
- Thumbnail – Aptly enough, our example is an image of the beach.
- Name – Our group name is “Cleaning Up California Beaches”.
- Summary – Add a short description outlining the purpose of your group. Our group summary explains it all – “Leveraging Esri Apps to Clean Up California Beaches”.
Continue scrolling down the “Create New Group” page to finish the group settings.
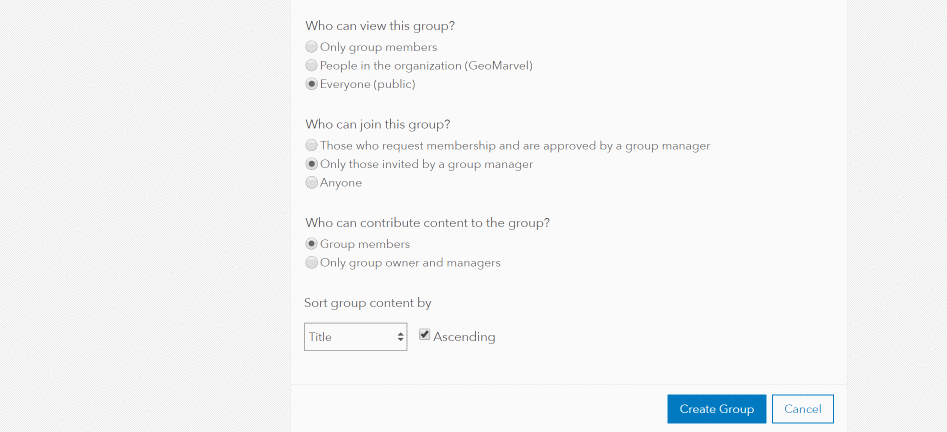
The remainder of the page lets you determine who can view, join, and contribute to the group’s work.
- View – Will your project contain sensitive data? If so, consider allowing “Only group members” to view this group.
- Join – Choose how you’d like users to join the group. Can anyone join? Or would an invite be more appropriate for the purpose of the group?
- Contribute – Decide who should contribute to the group – All members or just the owner and managers?
Don’t worry about having the perfect group settings, as they can always be adjusted from the “Settings” tab of the group page. Once you’ve determined the group settings, click “Create Group” to wrap up the group creation.
Next, because we chose a closed group, let’s add a few users to the group. Navigate to the “Members” tab to begin adding new members. By default, you’ll select members from your organization, but this setting can be toggled off to expand your search. Continue adding members as desired, then continue on to the next step.
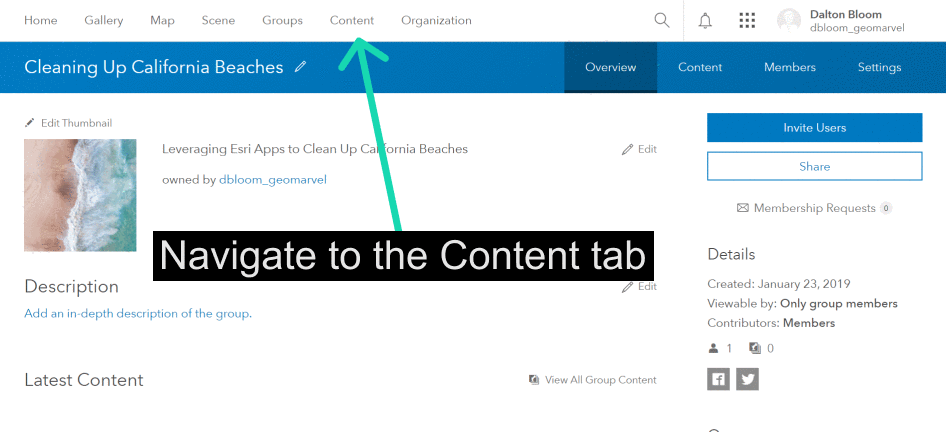
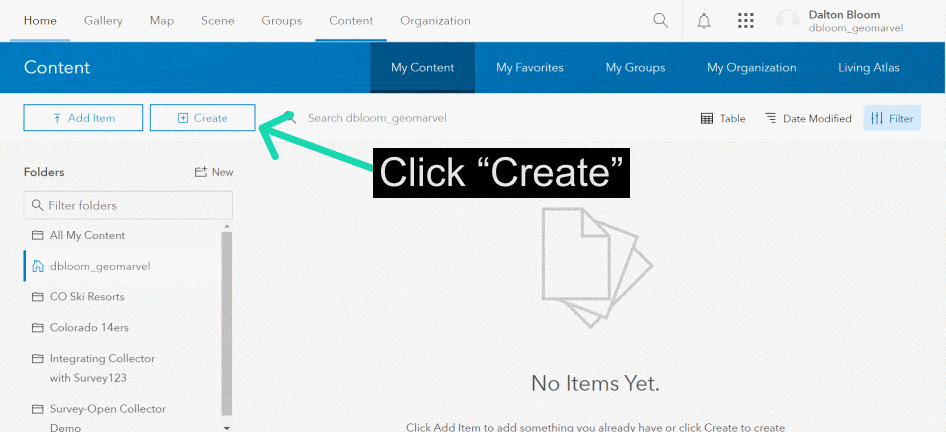
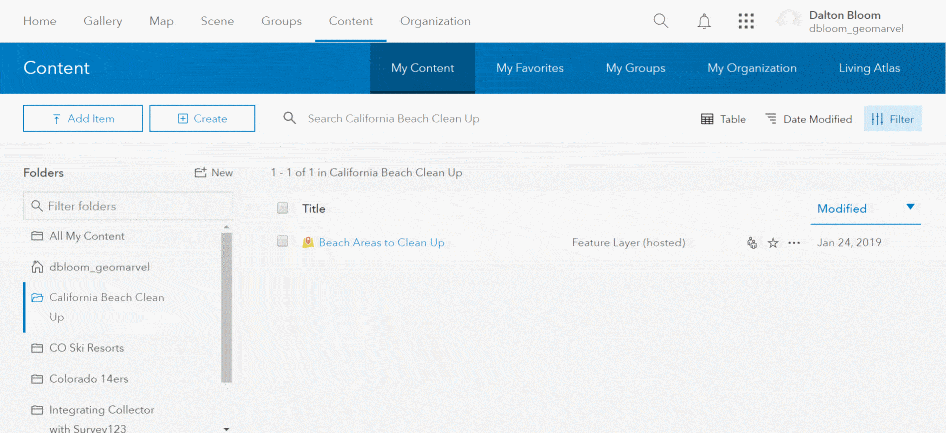
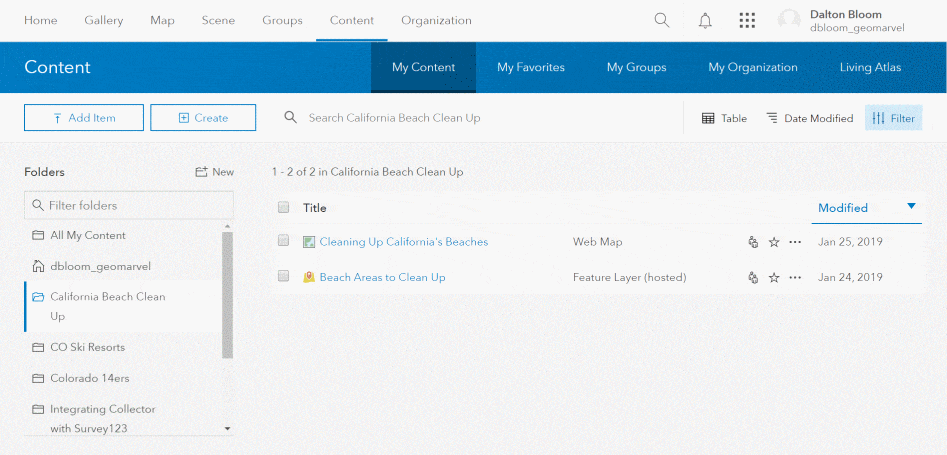
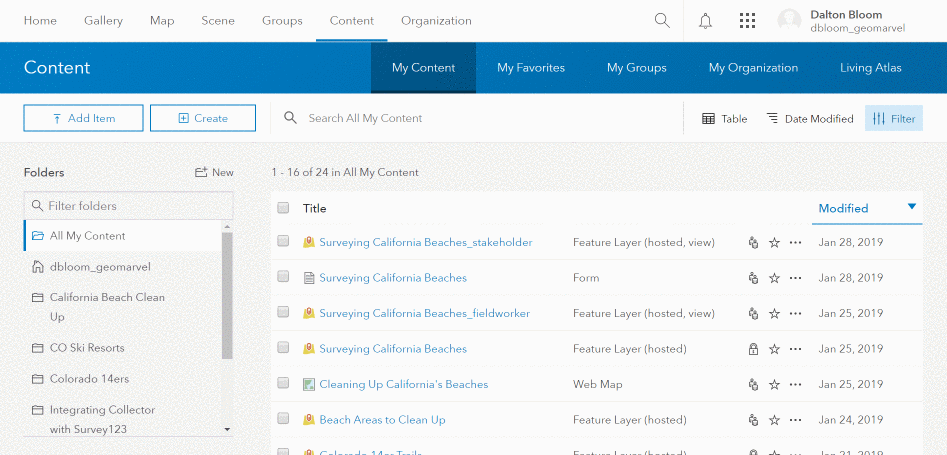
It’s important to stay organized when diving into GIS. Now that we’ve made a group for the project, let’s create a folder to house all our files. From the “Content” tab, click “New” to create a new folder for the project.
It’s time to create a polygon feature layer. The feature layer will host our polygon features outlining which extents of the beach require clean up efforts.
By default, the new feature layer should save directly into the folder you just created for the project. Next, let’s share the new polygon feature layer with the group created earlier – “Cleaning Up California Beaches”.
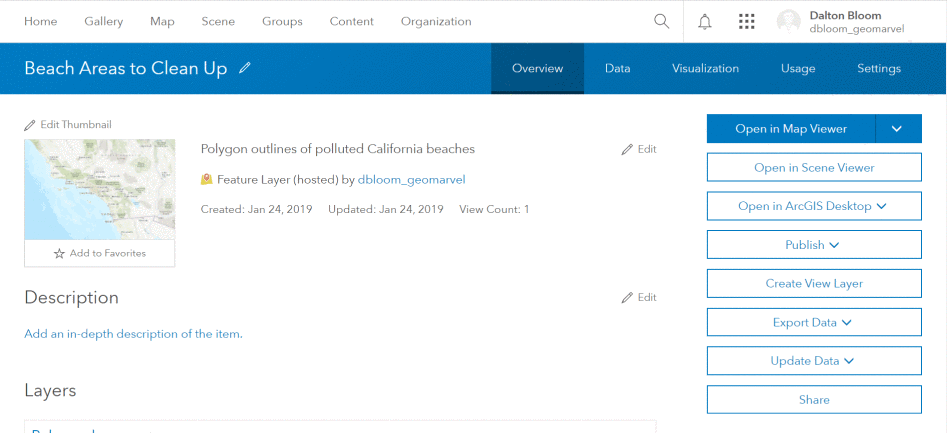
The next step is to create a web map, add the polygon feature layer, and share the web map with the group created earlier.
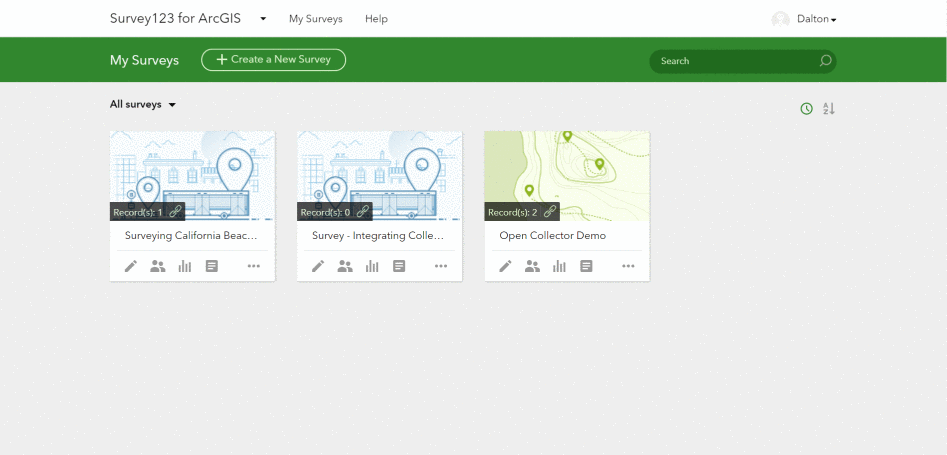
So far we’ve successfully created a new group, folder, feature layer, and web map for our project. Now it’s time to jump into form creation in Survey123. Go to Survey123 and login to begin creating a new form. Create a new survey and set the desired name, tags, and summary.
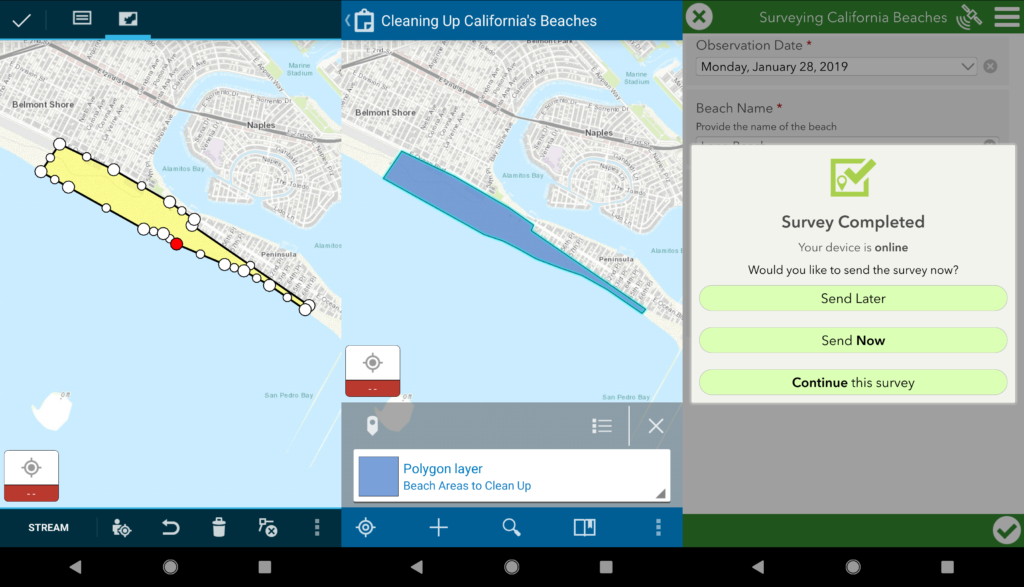
With the new survey created, let’s dive into the survey form builder. There are a number of question types that can be added to your survey. Let’s build a Survey123 form that enables users to record the date, beach name, surveying location, and gather polygon data with Collector.
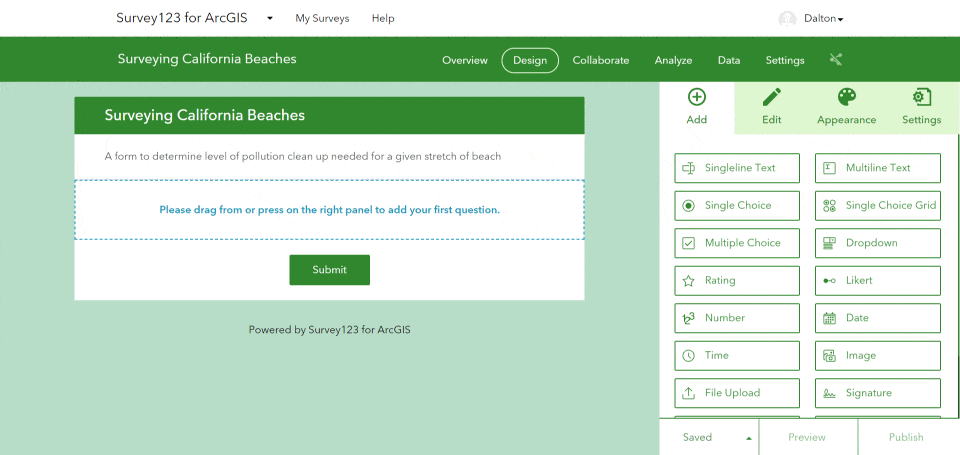
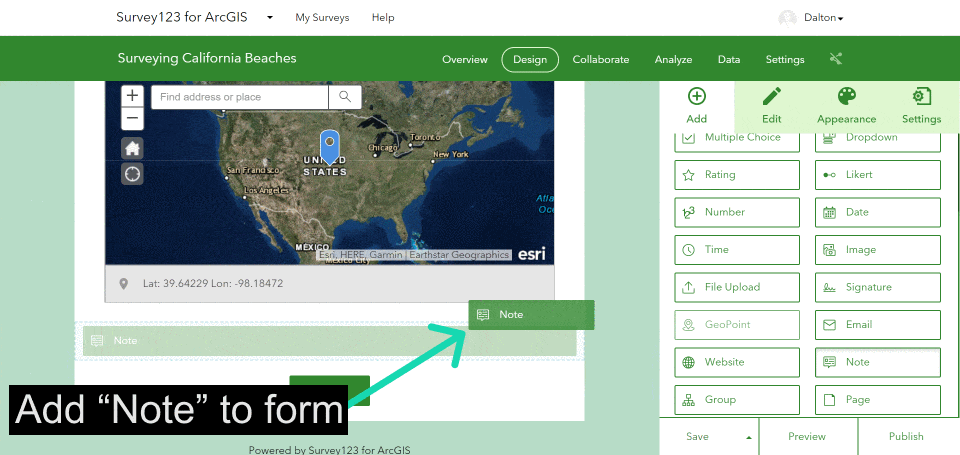
In order to integrate Collector with Survey123, we’ll add a “Note” item to the form in a similar fashion as before. Click and drag the “Note” item into the form, and follow along to integrate with Collector. Before adding the “Note” item to the form, you’ll need to find the web map ID from the URL of the web map created earlier. To find the web map ID, return to the “Content” tab of your ArcGIS Online account, and open up the Map Viewer.
With the web map ID copied, return to the Survey123 form. Continue by adding a “Note” item to the form. Within the “Note” description, add a link that prompts Collector to open your previously created web map in order to collect a polygon of the beach extent.
Collector command prompt – “arcgis-collector://?itemID=35b1ccecf226485ea7d593f100996b49”
Delete everything after “itemID=” and paste in your web map ID to prompt Collector to open for data collection within the designated web map.
After publishing the survey, be sure to share it with the group created for this project. Sharing the survey with the group allows all group members to access the Survey123 form to collect data.
* Before continuing, ensure you have Survey123 (Google Play | App Store) and Collector for ArcGIS (Google Play | App Store) downloaded on your mobile device.
Once the Survey123 form has been published, it’s time to test the form and link. Open the Survey123 application from your phone and download the newly created survey. Fill out the form to identify a California beach in need of clean up. Our example shows a stretch of Long Beach.
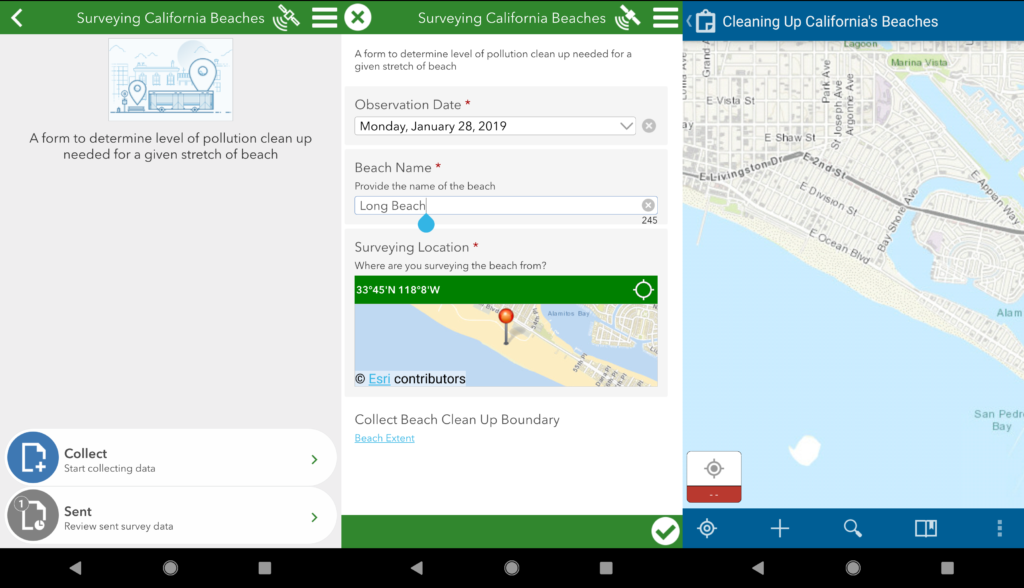
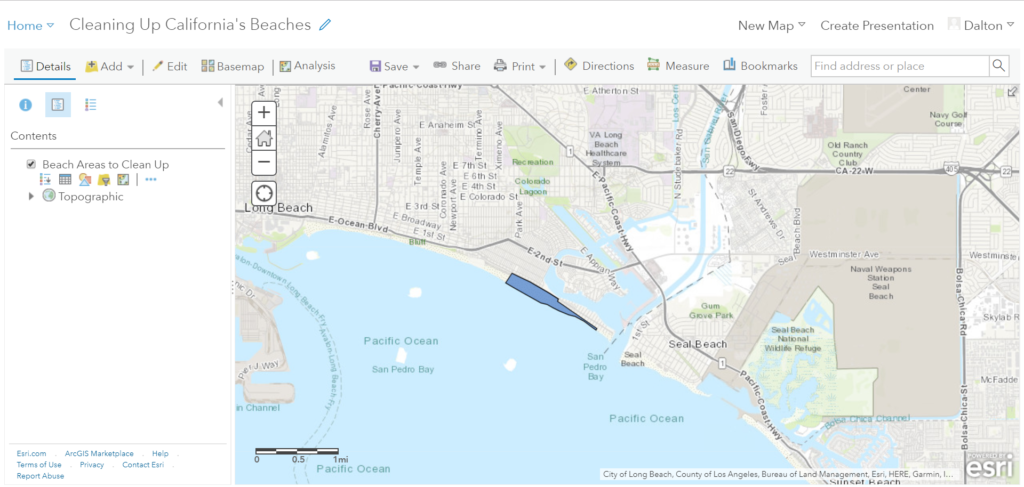
The polygon collected via Collector and the Survey123 form should now be visible on the web map associated with the project. As shown below, the polygon created via Collector is immediately viewable within the project web map. Continue collecting polygons with this method as desired for the project tasks.
Move all items associated with the project into the project folder for effective file management. This will ensure all relevant data is easily found within the designated folder.
Get Support
You have now learned how to open Collector for ArcGIS via a Survey123 form. This integration of field mobility apps can open a whole new world of data collection possibilities. Ready to learn more about field mobility app integration? Contact our industry experts to start a conversation and discover the endless possibilities today.